This tutorial covers computing and modifying screen pixel density and degrees of visual angle values in LabMaestro.
Pixel density is expressed as pixels per inch (ppi) or pixels per centimetre (ppcm) and is determined by your screen’s resolution and physical size, according to the formula:
We don't have a way to export this macro.
Where:
-
W is the width of the display in pixels
-
H is the height of the display in pixels
-
D is the diagonal size of the display in inches
Pixel density, along with the viewing distance, is used to determine the dimensions of stimuli in degrees of visual angle (dva), a standardized measurement in vision science. The pixels per degree of visual angle, or ppd, is calculated as:
We don't have a way to export this macro.
Where
-
PPI is the pixels per inch
-
d is the viewing distance in centimetres
-
2.54 is the conversion factor between inches and centimetres
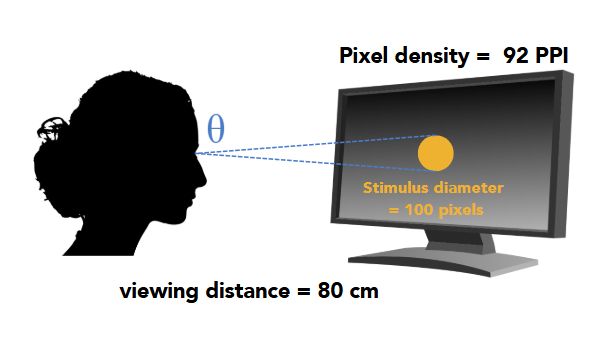
To calculate the degrees of visual angle of a given stimulus, divide the size of the stimulus in pixels by the ppd. For instance:
A target measuring 100 pixels in diameter on a screen with pixel density of 92 ppi viewed at a distance of 80 cm:

Pixels per degree:
We don't have a way to export this macro.
Then to solve for the degrees of visual angle of the target:
We don't have a way to export this macro.
Thus we can say that the target subtends 0.6 degrees of visual angle.
Measuring pixels per inch (ppi) on your display
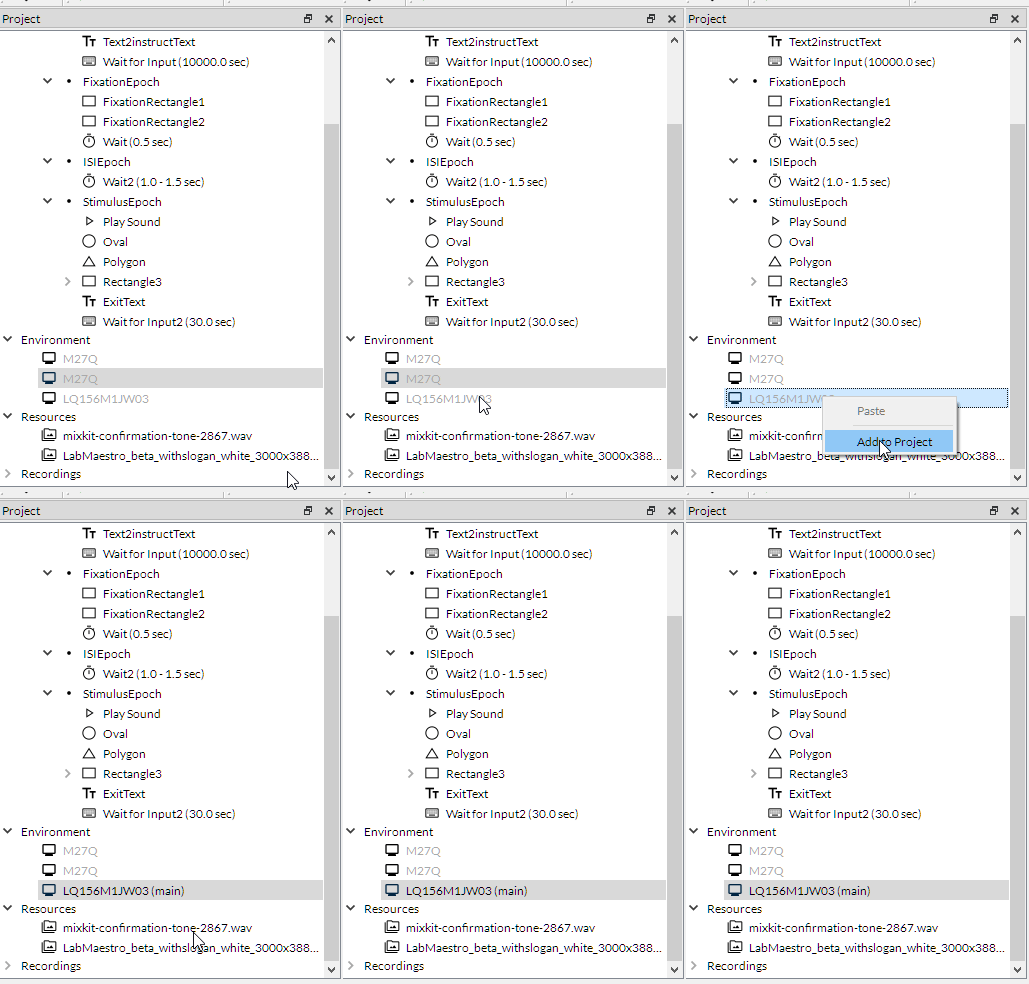
Add the display to your LabMaestro project
You can add a display to your project by right-clicking on its name in the Environment list of the Project window, and selecting ‘add to project.’ Displays added to a project will appear in a darker font.

Automatic pixel density detection
LabMaestro automatically detects your connected display's resolution and physical size and computes a default ppi value based on these values. The property expression Display.PixelsPerInch allows you to access this value.
Entering a custom pixel density value
You can enter a custom pixel density in your project display settings. This will overwrite any default value computed by LabMaestro. To enter a custom ppi, click on the display in the Project tab and enter the desired ppi in the field labelled Pixels Per Inch (custom).
Measuring and validating your display’s pixel density
If LabMaestro does not detect a valid pixel density value, or if you want to validate the automatically computed value, you can use the … button next to the custom field to measure pixel density manually.

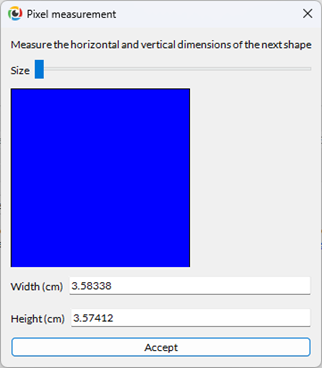
This will open a pixel measurement widget:

To calculate ppi, measure the blue square using a ruler. You can adjust the square’s size using the slider to make it more comfortable to measure.
Default values in the width and height fields correspond to values automatically detected by LabMaestro. They should be close to your manual measurements. You can overwrite these values with your measurements if you choose.
Once you have confirmed your display measurements, press the Accept button. LabMaestro will save your pixel density measurements in your project settings.
Entering the viewing distance
The viewing distance is saved as a display property and can be accessed and modified by double-clicking on the display in the Project tab. Updating the viewing distance value will update the project’s pixels per degree value and thus modify any stimuli with properties defined in dva units.
