Now that you have created an account, you can upload an experiment onto Pack&Go. Below are some programming language-specific tips for preparing your study. Click on the arrow to expand the section.
Once you have successfully tested your code on your local computer, and are ready to upload the experiment to Pack&Go, follow these steps:
-
Create a zip file containing all of your experiment programs, image files, input data files and everything you would need to run your experiment locally. The main experiment file should be:
-
A script, not a function
-
Located in the root of the zipped folder and not in subfolder(s)
-
-
Navigate to the Scientist Portal and log in to your account, and click on the Experiments tab. Add a new experiment by clicking the Add Experiment “+” Icon
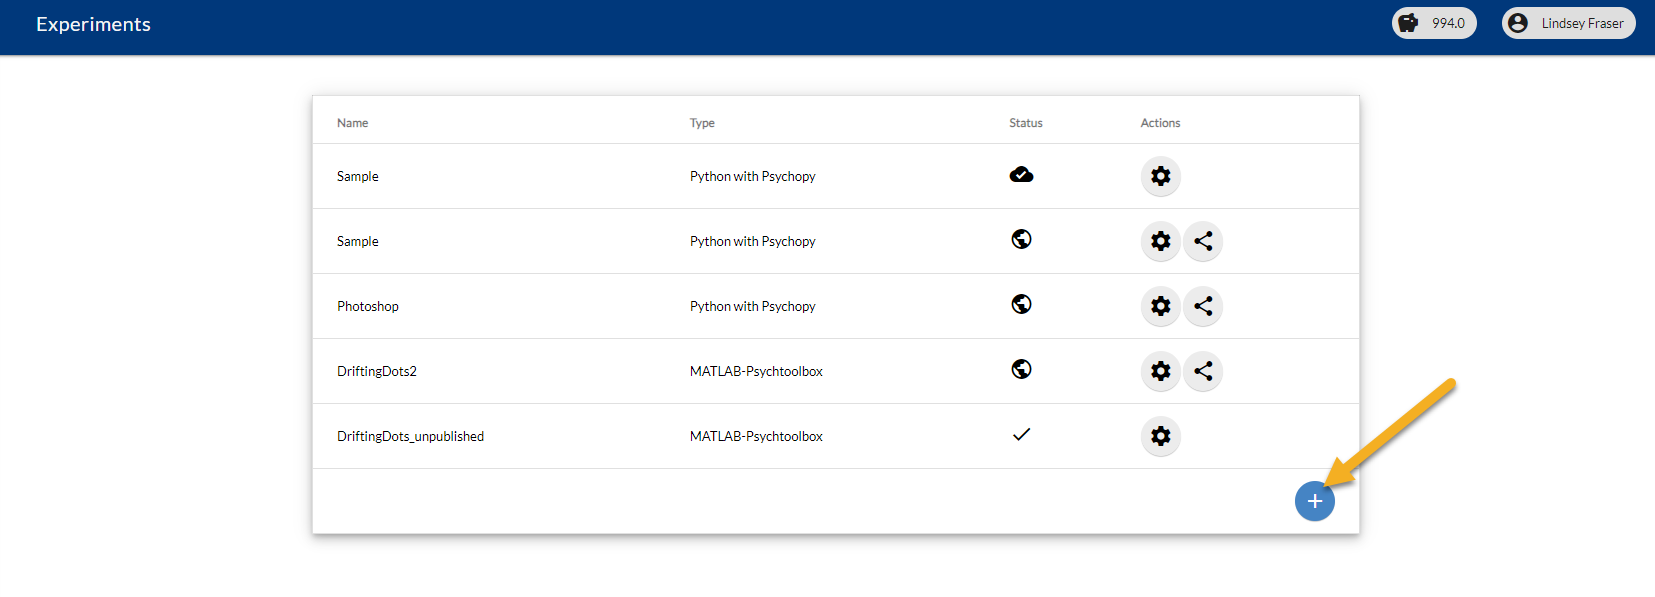
The main Experiments page
-
Enter the name (A) and description (B) of the experiment. Specify the region where you would like your data to be saved (C). Choose the platform you want to use (e.g. MATLAB-Psychtoolbox, Python, or Python with PsychoPy) (D).
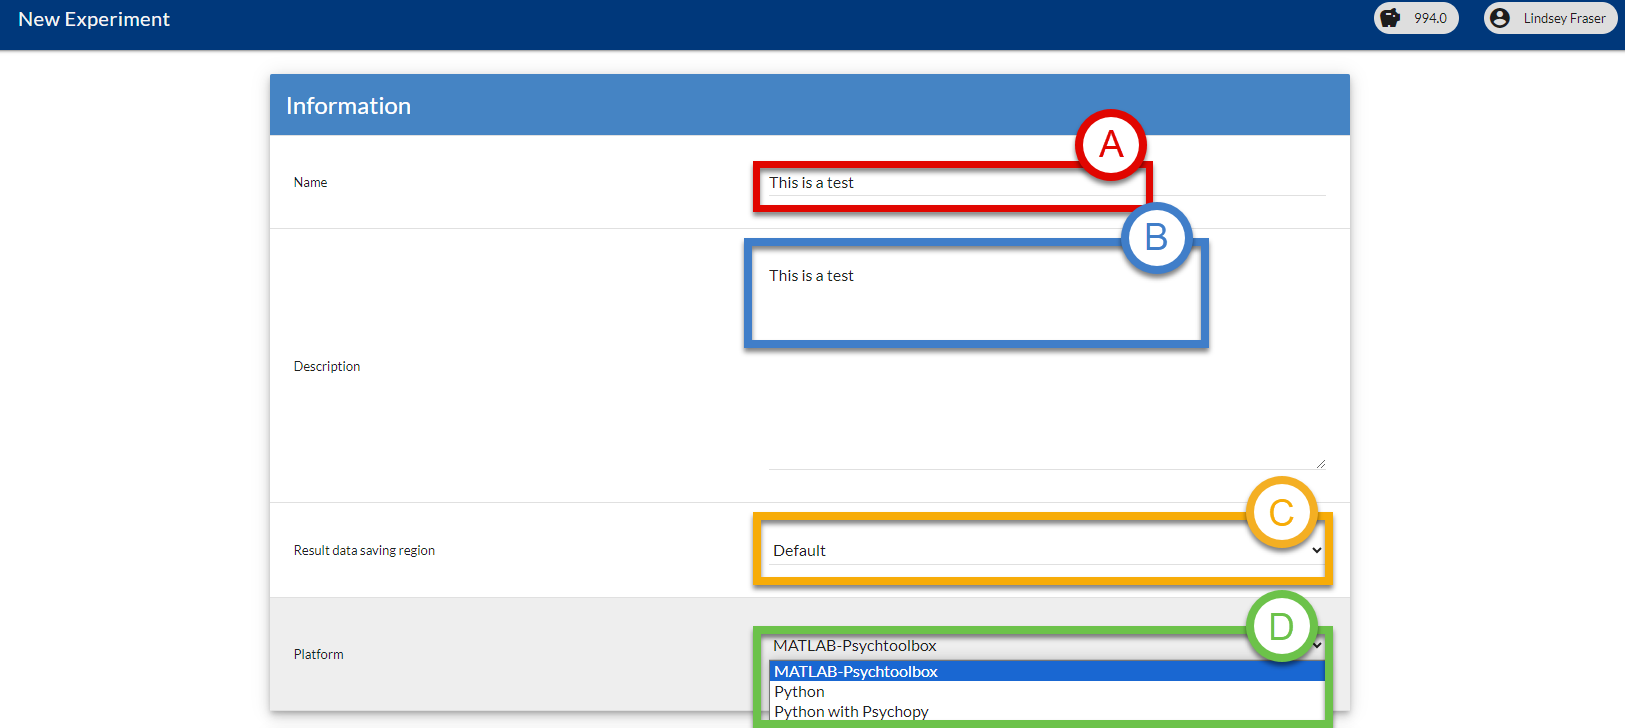
New experiment interface
-
Indicate whether this experiment is a follow-up study of a previously published experiment on Pack&Go. Previous studies must be either published or completed. If you specify this is a follow-up study, Pack&Go will automatically generate single-use invitation links for each link created in the previous study. Any output files in the previous experiment will be transferred to the new experiment.
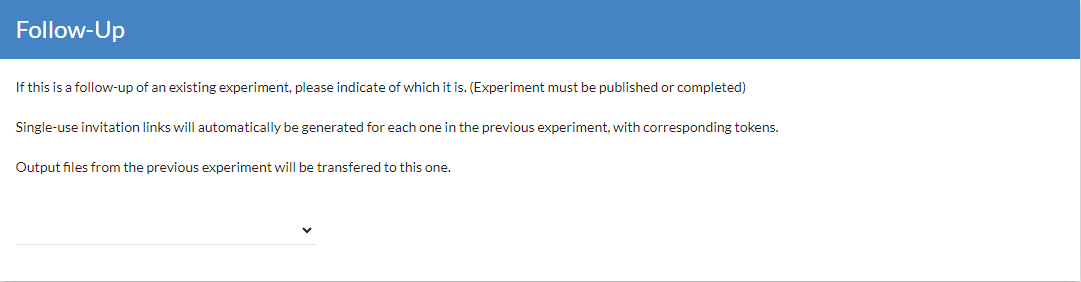
Follow-up section
-
Choose which aspect to prioritize under the “Strategy” heading. At the moment, we only offer the option to prioritize latency. This means the study will be optimized to introduce the lowest possible end-to-end latency, which is the time it takes for the experiment to update in the participant view following a participant input.

Streaming Strategy section
-
Set the hard time limit of your experiment, after which the experiment will be automatically terminated. This places a cap on the credits spent per participant. The default time limit is 30 minutes. The minimum time limit that can be set is 15 minutes and maximum time limit that can be set is 1 hour. Extended sessions are possible, but not reccommended. Save intermediate data files often in case subjects surpass the set limit.
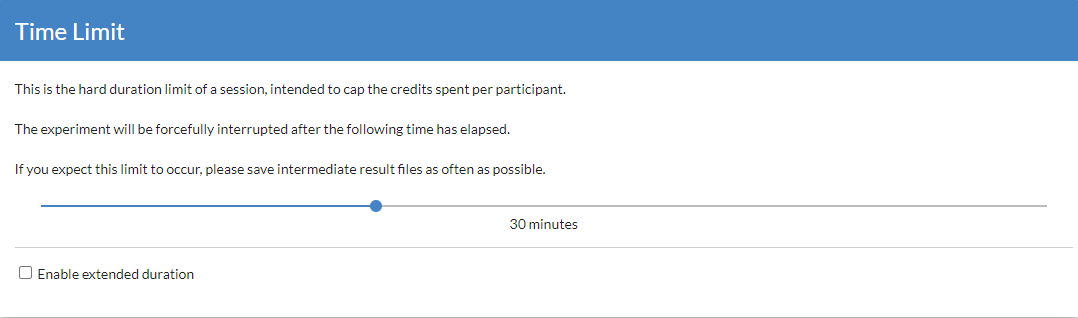
Time Limit section
-
Upload the experiment by navigating to the Upload File section and click the icon next to File. Find and select the zipped experiment folder created in step 1; click Create to upload the file.
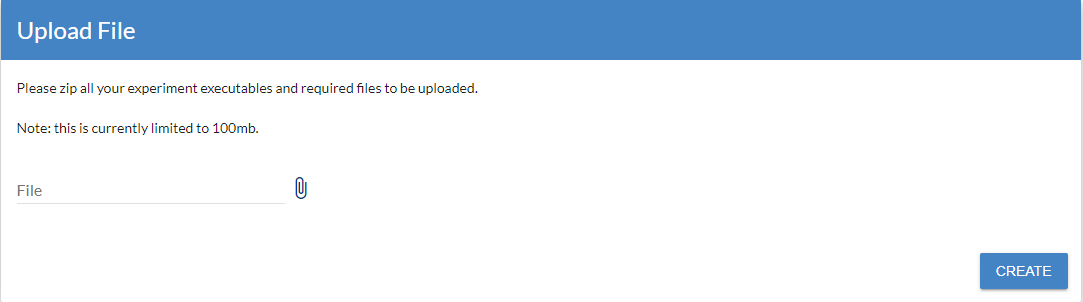
Upload File section
-
After the experiment has been uploaded you will see a summary of the Experiment information, you may edit the information or delete the experiment.
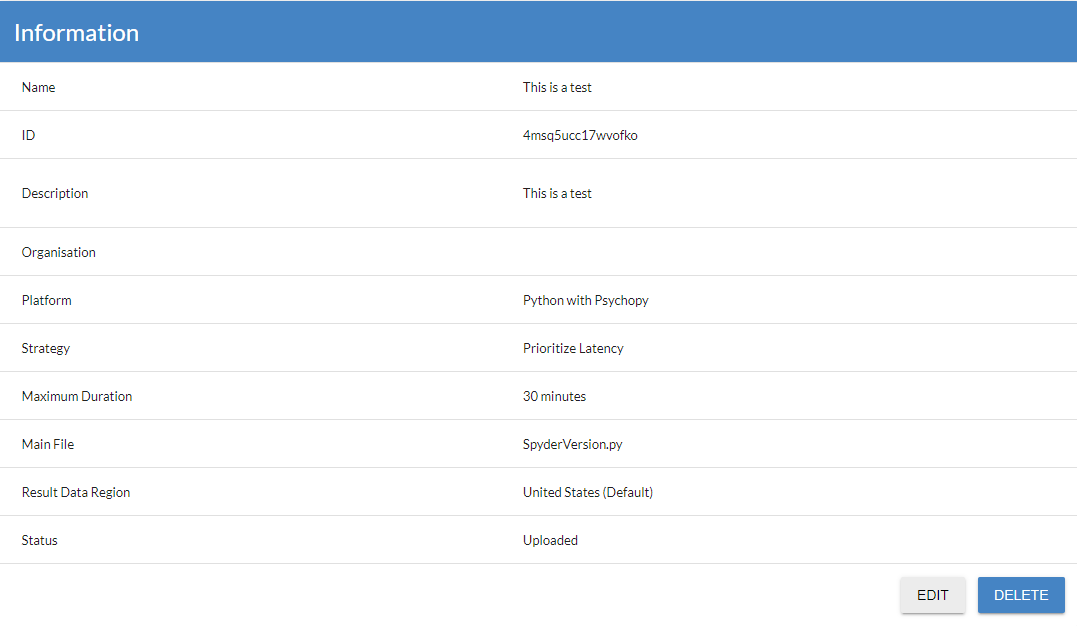
Experiment Information review section
-
You will also see the experiment’s associated files under the Files heading. Double check that all associated files are here.
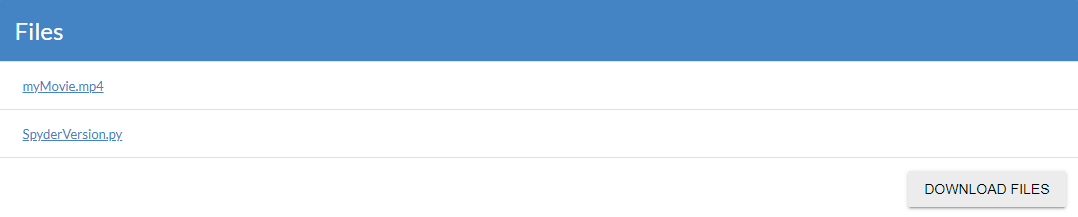
Files section
-
If everything looks correct, pack the experiment by clicking Pack under the Actions heading
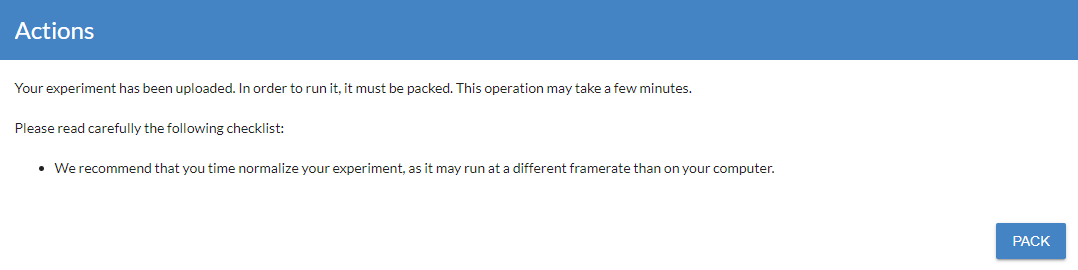
Actions section for a new study
-
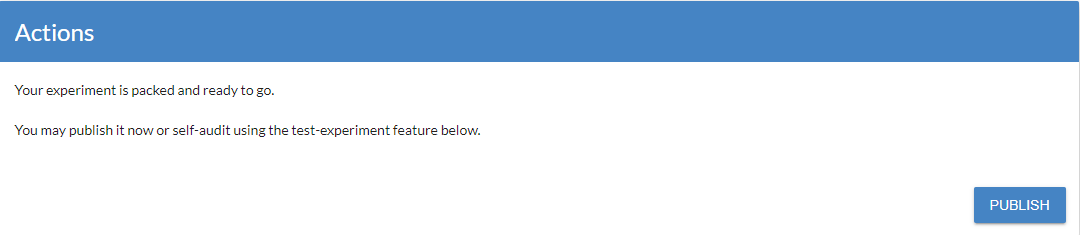
Once the experiment is successfully packed, the status of the experiment will change to “Ready to publish”
Actions section for a new study, once experiment file has been uploaded successfully