Updating firmware
Before you begin
-
Install the latest version of VPixx Software Tools.
-
Connect the VPixx device to your computer via USB and confirm the device is powered on.
The update procedure depends on your operating system. Use the menu on the right to navigate to the correct section.
Do not power off the device or disconnect the USB cable during a firmware update.
Windows and Linux
-
Open LabMaestro (search for it from the taskbar/app launcher).
-
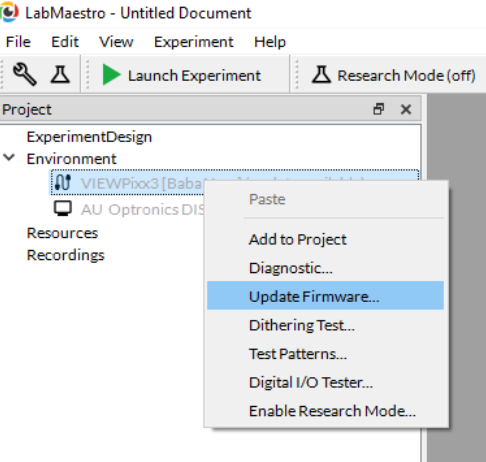
In the left-hand Project panel, under Environment, locate your connected device.
-
Right-click the device and select Firmware Update.
-
Follow the on-screen instructions to complete the update.
macOS
-
Open a terminal and launch the vputil command-line utility.
-
Run the following command:
fw_update -
Follow the on-screen prompts to complete the update.
fw_update attempts to update all VPixx devices connected to the computer. Disconnect any device you do not want to update before running the command.
How to identify your current firmware revision
Windows and Linux
-
Open LabMaestro (search for it from the taskbar/app launcher).
-
In the left-hand Project panel, under Environment, locate the connected device.
-
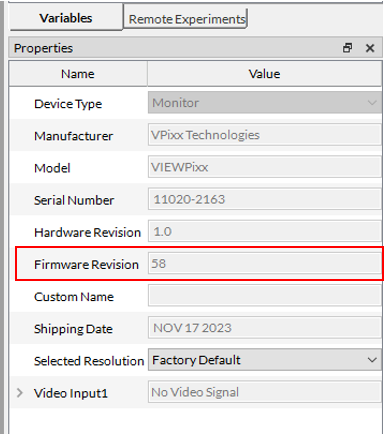
Click the device. The Properties panel opens on the right.
-
In the Properties panel, find Firmware Revision to view the current firmware version.
macOS
To view the current firmware revision, use the vputil command-line utility (included with VPixx Software Tools).
-
Open vputil (from your Applications folder, or by searching for “vputil”, or by launching it from Terminal).
-
At the prompt, type:
rev -
Press Enter. The firmware revisions for all connected VPixx devices are displayed.