Configuring Linux systems, particularly for multiple displays, can be challenging. Linux uses an older X-Server (Xorg) engine to handle multiple displays. Management of various monitors is typically done via multiple instances of X-Server screens, and saved as a single configuration. This approach is distinct from Windows or macOS, which list each monitor as an independent screen.
In this guide we demonstrate how to configure multiple displays on Linux and select custom resolutions when needed.
Setting up instances of X-Server screens
Psychtoolbox’s XOrgConfCreator greatly simplifies this process. You will need to have Psychtoolbox installed to use this script. For installation instructions, please refer to this webpage.
With all monitors connected and detected, open Matlab or Octave and enter the command XOrgConfCreator. This function will prompt you to assign specific monitors to unique X-Server screens. Typically, the first X-Server Screen is the experimenter’s display (i.e., what the researcher uses). Once the first screen is set up, follow the prompt to create a second X-Server screen for the stimulus display (what the participant sees).
Monitors connected via a DATAPixx series I/O hub, or a PROPixx Controller, may be labeled as the VPixx device name rather than the make and model of the monitor.
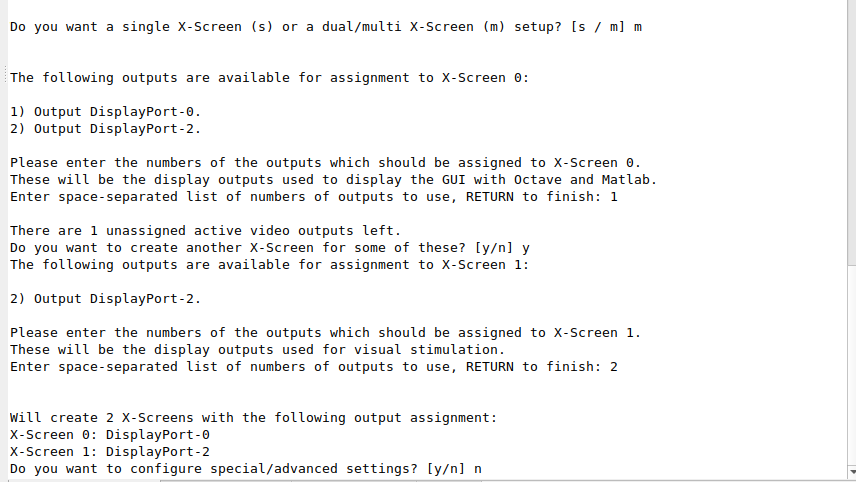
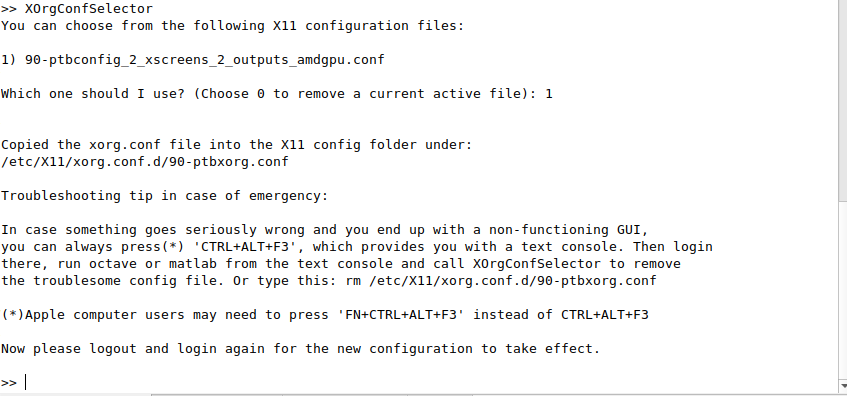
Once the configuration is done, save it as the default offer path, or a preferred path. The configuration can be subsequently invoked via the script XOrgConfSelector. Once the configuration is invoked, you will need to log off and log back on for it to be applied.
Interacting with multiple displays in Linux
When there are two X-Server screens, the interactive desktop is only shown on the first X-Server screen (the experimenter display).
Your experiment scripts can be run on the 2nd X-Server screen. To ensure stimuli appear on the correct screen, consider creating experiment windows with the following:
You can also run programs/commands on the stimulus display using the DISPLAY=:[X-SERVER NUMBER]in the command line:

Changing display resolution
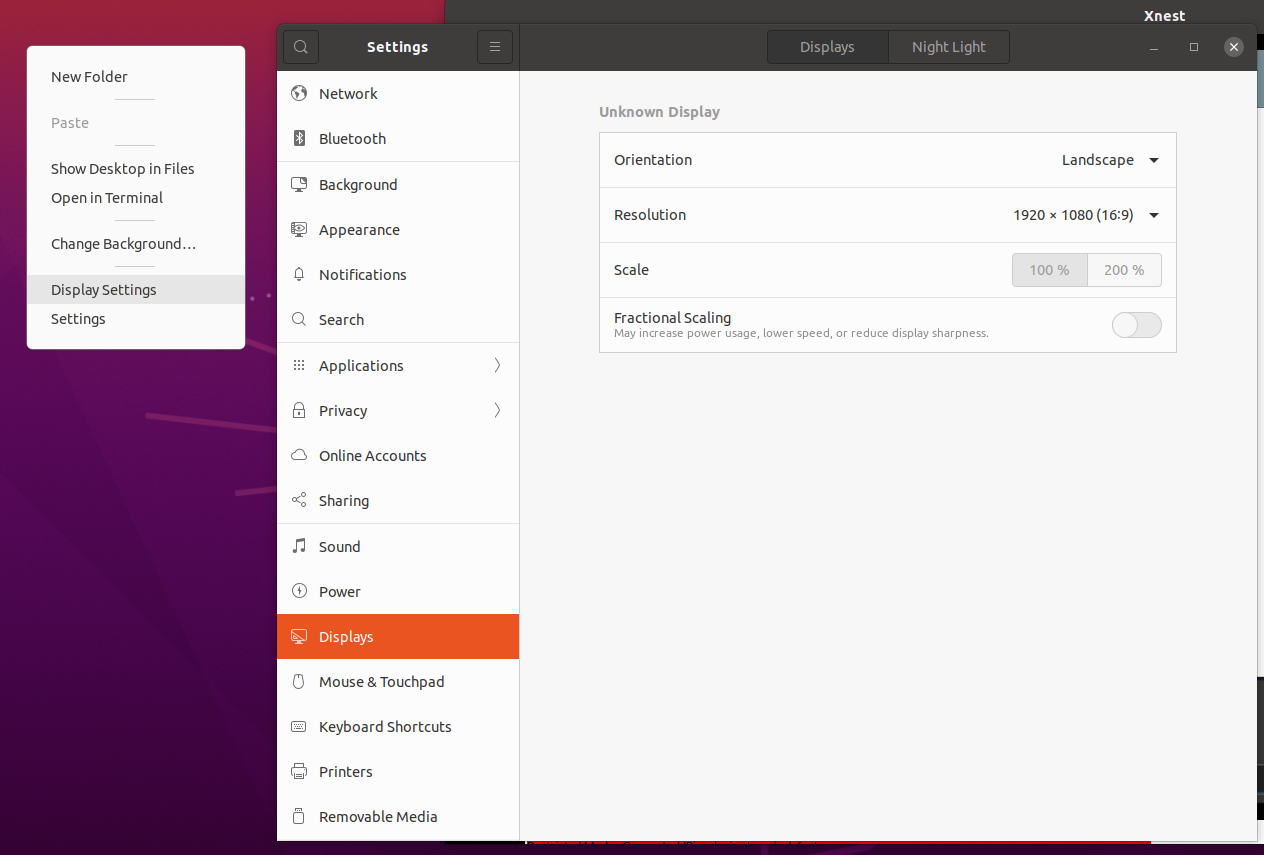
Changing the resolution and refresh rate of a display is done using “Display Options” in the operating system. However, this might not work for all resolutions.
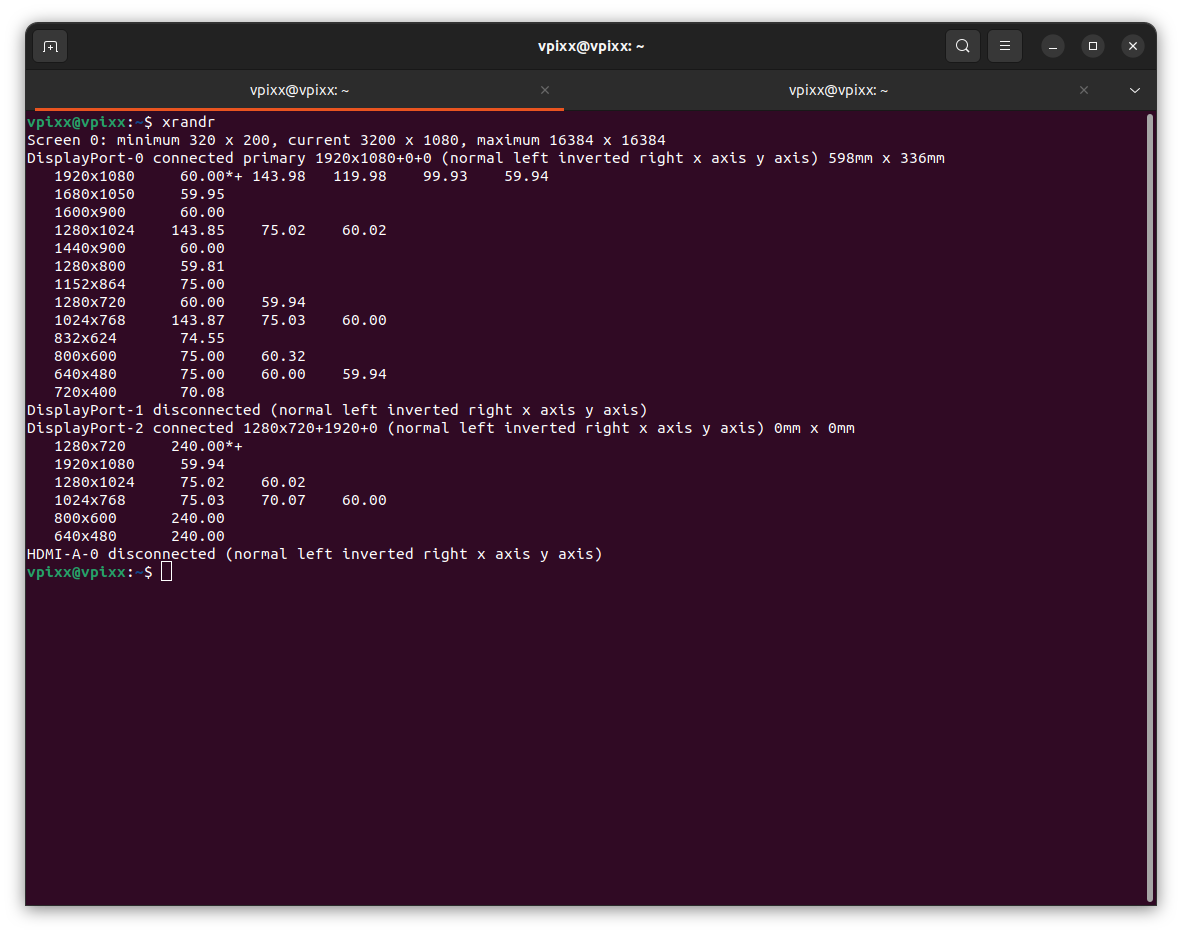
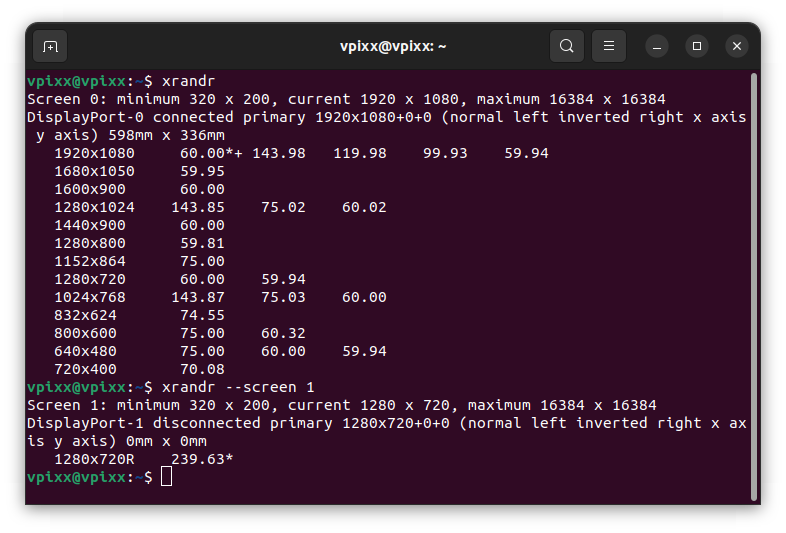
To identify the current and supported resolutions, run the xrandr command in the terminal. If you have previously set up the screen using X-Server, you may need to provide the screen number via the --screen option, i.e. xrandr --screen 1.
This command will return a list of available resolutions, with two symbols, * and +. The * next to a indicates the resolution currently in use. The + indicates the monitor’s preferred resolution (the one found first in the monitor’s resolution information, called EDID).
If you wish to use a resolution that is not listed, or if a listed resolution is not working, you must (re)add it to the list and then apply it:
-
Generate the resolution using the cvt utility. In terminal:
cvt -r Vertical Horizontal RefreshRate
cvt -r 1280 720 240
Note the -r here, meaning reduced timing, which increases speed and removes some of the “blanking” at the end of the frame. This is often necessary to fit the maximum bandwidth with dual-link DVI.

-
In terminal, create a new mode with the resolution details generated in step 1.
xrandr --screen 1 --newmode "ModeName" NumbersFromAbove
xrandr --screen 1 --newmode "1280x720R" 279.50 1280 1328 1360 1440 720 723 728 810 +hsync -vsync
This creates a new mode called “1280x720R.” -
Add the new mode to a specific X-Server screen. In this example, the target screen is named “DisplayPort-1”, you can find the screen name in the output of the xrandr command.
xrandr --screen 1 --addmode DisplayPort-1 1280x720R -
Activate the mode:
xrandr --screen 1 --output DisplayPort-1 --mode 1280x720R
Following this process the screen will flash and the new resolution will be displayed. You can verify the new refresh rate is applied via your preferred software tool (MATLAB, LabMaestro, etc.) Note that the stimulus display will not show any content unless you have opened a window or application on that screen.
If the screen is not compatible with the resolution you created, the resolution will revert to the last used resolution. You can verify that your mode is working with the xrandr command. As mentioned above, your new resolution should have a * next to it that shows it is applied.
Setting a new default resolution
There is a file called “.xprofile” in the home directory that contains the X-Server commands implemented at login. If the file does not exist, it can be created via this command in terminal:
touch ~/.xprofile
Once the file exists, it can be modified to create and apply a custom resolution on a given screen, as described above. This will be performed on every subsequent login.
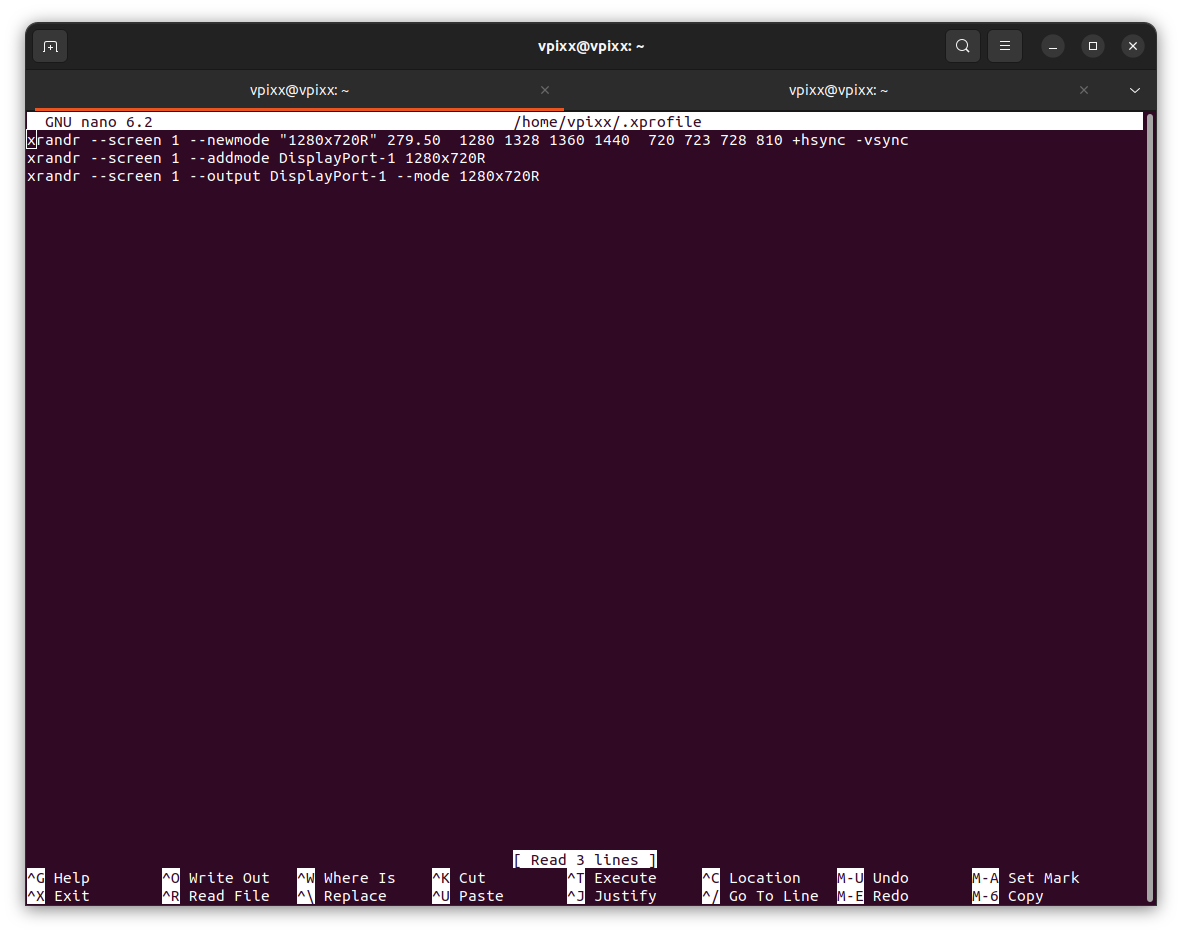
An xprofile file, located in your home directory (~/.xprofile) allows you to execute commands at the beginning of the X user session - before the window manager is started. If the file exists and has any command, simply add the commands below at the end of it.
xrandr --screen 1 --newmode "1280x720R" 279.50 1280 1328 1360 1440 720 723 728 810 +hsync -vsync
xrandr --screen 1 --addmode DisplayPort-1 1280x720R
xrandr --screen 1 --output DisplayPort-1 --mode 1280x720R
If you wish to use a different mode, you can generate all the necessary timing beforehand and run the final command to change the resolution to the new mode.