Regions are filled with patterns that define the shape and extent of visual stimuli appearing on a stimulus display.
Regions can be specified in various shapes, sizes, and locations and filled with anything from a fixed Uniform Pattern color to a complex combination of dynamic Patterns customized with Combine Modes. LabMaestro directly supports common shapes.
Shared Region Parameters
Region Center
Center allows you to specify the location of the region’s center relative to the testing display. The center coordinates can be defined as degrees of visual angle, pixels, and centimeters. LabMaestro also offers the flexibility of specifying the center in rectangular or polar coordinates.
Geometric polar coordinates have a 0-degree origin towards the right, with increasing angles rotating counter-clockwise. Geographic polar coordinates have a 0-degree origin towards the top of the display, with increasing angles rotating clockwise. The polar coordinate systems are convenient if you conceptualize your stimulus location in visual eccentricity and meridian.
Changing the coordinate space buttons or the linear units will automatically convert the existing coordinates to the new space and units.
Region Orientation
The Orientation parameter allows you to specify the clockwise or counterclockwise rotation of the region in degrees.
Region Colors
All the region dialogs have color spaces, which allow you to specify a single color or a range of colors that fill the region during the presentation.
If you want the region to contain a solid field of a single color, it is possible to specify the color by its name (for example, black, white, gray, red, green, blue, or yellow).
You may also specify the region color in general RGB (red/green/blue) coordinates. If you set the color space popup to Color: RGB, you must enter the red, green, and blue coordinates in the three-parameter fields under the popup. Each coordinate should be between 0 and 1, which corresponds to the full-scale range of the output video display.
Sometimes, you will require regions consisting of a single solid color, but more often, you will want to fill a region with a static or dynamic pattern that spans a range of colors. For example, you might want to fill the region with a grating having a sinusoidal luminance profile.
LabMaestro provides you with great flexibility when specifying this range of colors. Enter the coordinates of the two endpoints of the desired range. You can specify the endpoints in RGB. First, select the color space in which you would like to define the endpoints of the region's range of colors, and then enter the endpoint coordinates in the Peak and Trough fields.
There is one final color space called "Full Color." This space should be selected for the cases when the region contains a pattern that will be shown in the full 3D RGB space.
Region Flicker Waveform
All regions have a Flicker Waveform parameter group, which allows you to temporally modulate the patterns within the region.
To enable region flicker, click the check-box just on the left of the Flicker Waveform group box title. The push buttons to the right of the group box title allow you to specify sinusoidal, square-wave, triangle-wave, or ramp flicker waveforms. The Amplitude, DC Offset, Phase, and Symmetry parameters give you complete control over the flicker waveform and the Temp. Freq. parameter allows you to specify the frequency of the flicker in Hertz.
Region Geometry
Geometry is used to specify region size. The default units are pixels, but if you have specified a target display, you can specify the dimensions in centimeters or degrees of visual angle. The unit selection serves as a conversion calculator. If you specify the dimensions using one unit type and then change the units, the Width and Height parameters will change values to reflect the new units.
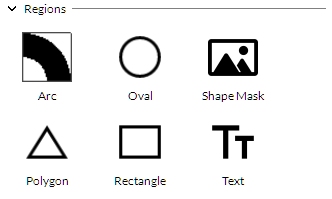
Supported Regions
Below is a list of all the regions supported by the software, along with any additional parameters they have:
Rectangle Region
The rectangle region is perhaps the most commonly used region shape. Standard use cases include defining background color for the experiment.
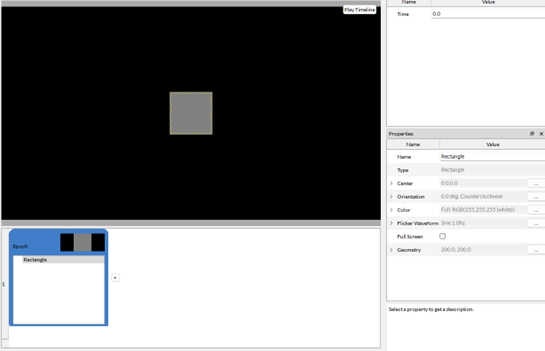
The rectangle region does not have any additional parameters.
Oval Region
The Oval region creates circular or oval-shaped regions.
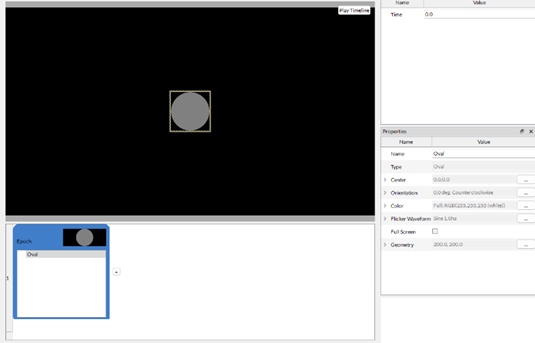
The oval region does not have any additional parameters.
Arc Region
The Arc region creates arc segments, pie wedges, and annuli. Specifying the inner and outer radii, start and stop angles, center of curvature, and chromatic content.
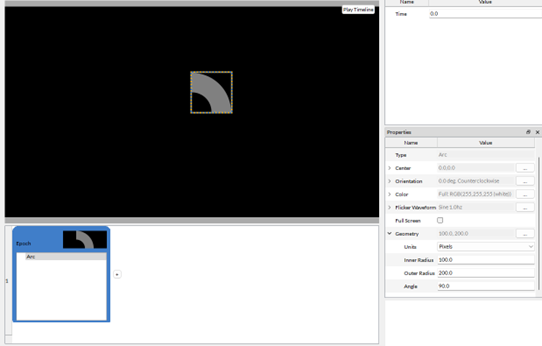
The Geometry parameter of arc regions is different from other regions. It uses the following properties instead:
-
Inner Radius: Radius of the inner portion of the arc.
-
Outer Radius: Radius of the outer portion of the arc.
-
Angle: The angle of the arc region in degrees.
Polygon Region
The Polygon region allows you to create polygons of any shape by specifying the number of sides.
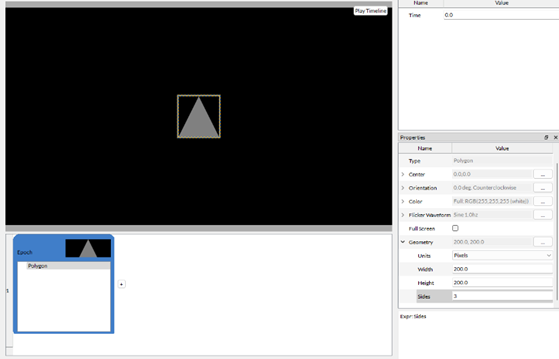
The Geometry parameter has an additional property, Sides, used to specify the number of sides of the region.
Text Region
Create text regions, specifying text string, font, point size, style, alignment, location, chromatic content, and more.
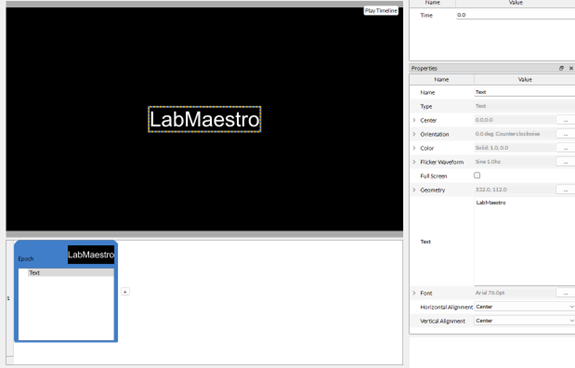
Test regions have four additional properties that can be defined:
-
Text: Define the text string that will be shown.
-
Font: Define the font and font size of the text string. You can also toggle options to make the text Bold, Italic, Striked, Underlined, and Kerning.
-
Horizontal Alignment: Specify the horizontal alignment of the text string. Options are Center, Left, and Right.
-
Vertical Alignment: Specify the vertical alignment of the text string. Options are Center, Left and Right.
The Font property can be defined as any font currently installed on your operating system.
As of Version 1.11, LabMaestro experiments can now be run online using VPixx Pack&Go. If you intend to run an experiment online, you should ensure your font is properly rendered with the latest version of Pack&Go.
Shape Mask Region
If you require any region shape that is not directly supported, you can draw the shape in your favorite graphical editor and import it into LabMaestro with a Shape Mask Region. In the Project tab, right-click Resources to import a custom region to the project.
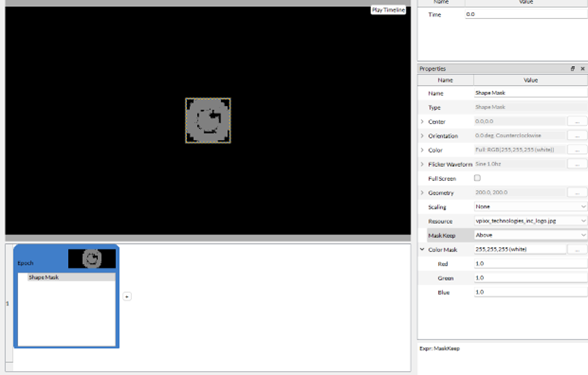
Once the region has been imported, you can use a Shape Mask Region and specify the custom shape with the Resource property.
Shape Masks have the following additional parameters:
-
Scaling: Allows you to shape the content of your region with different scaling options
-
Resource: The custom shape resource that your shape mask will show.
-
Mask Keep & Color Mask: The mask keep can be above or below. The mask color is the color value that dictates the threshold. If you select a color mask of [R, G, B], then for each pixel, it compares the color value of the resource to the selected [R,G,B]. If it's higher (if above is selected), it becomes part of the mask. If it's lower, we exclude it. The reverse is applied if below is selected.
For more practical examples using regions, please consult the Regions and Patterns demo available in the LabMaestro documentation.