Setup TRACKPixx3
To setup a TRACKPixx3 within LabMaestro, confirm that the DATAPixx3 and TRACKPixx3 are detected and added to the project. Refer to Adding VPixx Hardware to a project for more information.
This page assumes that the TRACKPixx3 installation has been completed and that users are familiar with its operation principles. Relevant documentation can be found here Principles of TRACKPixx3 operation.
Navigating to the Configure TRACKPixx Properties
Once the desired DATAPixx3 and TRACKPixx3 required project settings TRACKPixx3 Device Settings have been set and applied to the device, click on:
Setup TRACKPixx
Wake TRACKPixx
Configure Tracker
Configure Tracker Properties
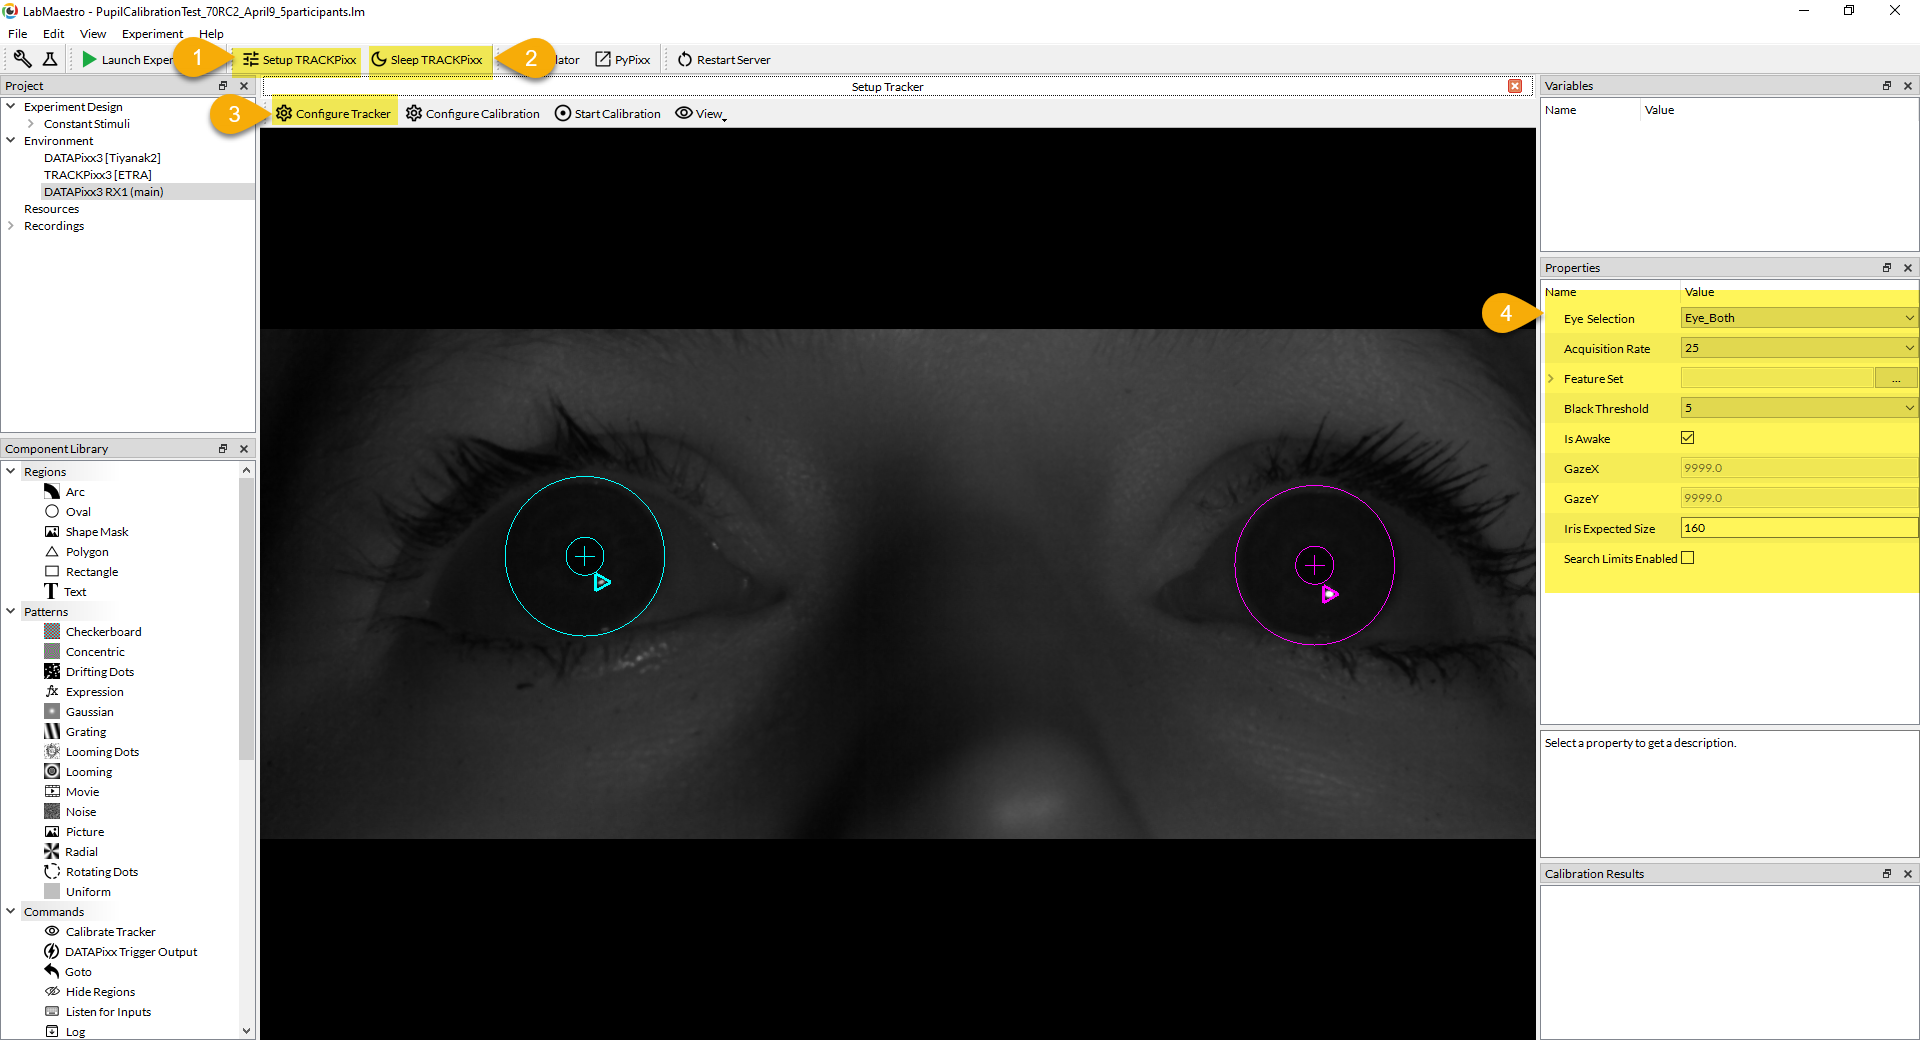
Accessing the Configure Tracker Properties in LabMaestro 1.7.0
Configure TRACKPixx Properties
The configure tracker properties are expected to be reviewed and modified on a subject-to-subject basis before launching an experiment, and are neither persistent across LabMaestro sessions, nor saved in LabMaestro Projects Files (*.lm) .
Eye Selection: Select the eyes for which to display annotations in the Screen Preview and Camera windows. By default, Eye_Both is selected. Alternative options are Eye_None, Eye_Left, and Eye_Right. Remember that in the TRACKPixx3 eye tracking convention, right and left eyes correspond to the eyes as they appear on the camera view and not to their anatomical position.
Acquisition Rate: The rate at which camera images are retrieved to update the live camera view. Does not affect the TRACKPixx3 gaze sampling rate.
FeatureSet: From this screen, modifies the current TRACKPixx3 Device Settings on the device. This does not modify the project’s required device settings.
Black Threshold: Pupil thresholding which can be set automatically by selecting “Auto” (0) in the drop-down menu or manually by selecting one of the integer values between 1 and 30 in the drop-down menu. Automatic thresholding is recommended in most cases. The effect of black thresholding can be visualized by enabling the Black Mask from the View → Advanced options.
Is Awake: Set whether the TRACKPixx3 is awake (TRUE) or asleep (FALSE).
GazeX: Read-only property reporting the mean left and right eye position on the horizontal screen space. Value reflects the Eye Selection property. GazeX can be referenced in an experiment through the Tracker component.
GazeY: Read-only property reporting the mean left and right eye position on the vertical screen space. Value reflects the Eye Selection property. GazeY can be also referenced in an experiment through the Tracker component.
Iris Expected Size: The diameter, in pixels, of the participant’s fixed iris size. Values between 140 and 160 are typical at a 60 cm tracking distance. The suitability of this value can be visually inspected from the camera's live view.
Search Limits Enabled: When enabled, this feature allows you to restrict the region where pupils and corneal reflections should be located. This can be useful when irrelevant reflections (e.g., spurious reflections on glasses) or dark locations (e.g., mascara) appear in the Camera picture. After enabling this feature, click and drag your mouse across the camera view, independently for each eye, to define the search limits.