Most of the information in this guide is only applicable to version 1.10 or higher of LabMaestro
Adding the PROPixx to a LabMaestro Project
To start, we need to enable LabMaestro to communicate with your projector. Ensure your PROPixx device is connected to your computer via USB. Once you have done so, open LabMaestro and create/open your project.
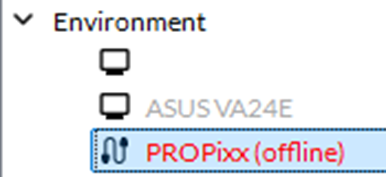
To add your PROPixx to the project, navigate to the Project tab, typically located at the top left. Under Environment, you will see your PROPixx's name in grey. Just right-click on PROPixx and select Add to Project.
If you do not see your PROPixx in this tab, your computer does not detect your device. Make sure your PROPixx is correctly connected to your computer via USB.
You can still add it to your project if you are working remotely and your PROPixx is not connected to your computer. Right-click Environment in the project tab and select Add, then VPixx Device. In the drop-down menu, choose PROPixx.


Your device will appear in red, as it is considered offline. Once your projector is connected to your computer, it should appear as usual.
If your device still is not recognized after completing these steps, there may be an issue with your hardware or experimental setup. Please get in touch with VPixx support so we can help you troubleshoot the problem.
Setting up the PROPixx
Once the PROPixx is added to your project, you can use it with LabMaestro. To ensure the highest quality of collected data, review the following sections to set up your hardware correctly so it is fitted to your project.
Setting up the PROPixx Desired Resolution (EDID)
The method for setting the PROPixx's resolution depends on whether you use a PROPixx Controller or a DATAPixx3. Once the setting is changed, restart your devices and select the new resolution through your operating system, just as you would with any monitor.
Changing the Resolution with PROPixx and DATAPixx3
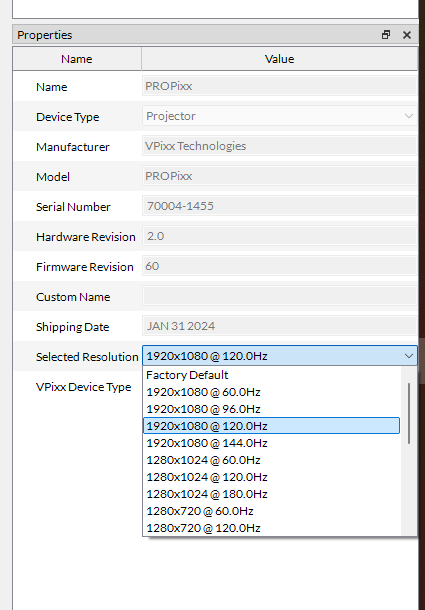
When using a DATAPixx3, you must change the resolution directly on the PROPixx. To do this, click on the PROPixx in the Environment, which will open the device's properties. In the Properties window, you can adjust the Selected Resolution and follow the prompts, which indicate that a device restart is necessary.
Changing the Resolution with PROPixx and PROPixx Controller
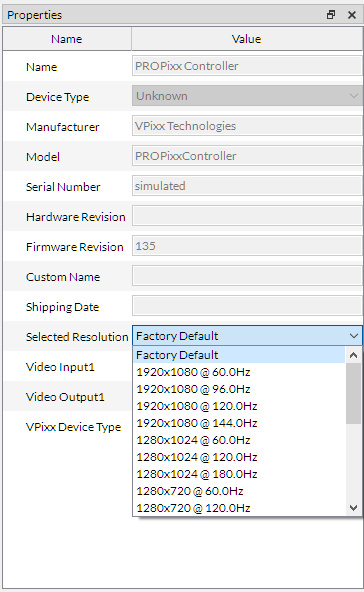
When using a PROPixx Controller, you must change the resolution directly on the Controller. To do this, click on the Controller in the Environment, which will open the device's properties. In the Properties window, you can adjust the Selected Resolution and follow the prompts, which indicate that a device restart is necessary.
Define PROPixx Settings
Before anything else, set the hardware settings to values compatible with your project. Double-click the PROPixx object in the Project tab under Environment. A contextual window should open (by default, centered in the LabMaestro interface). This can be done offline, even if the PROPixx is not connected to your computer. Here, you can edit the following properties under Project Requirements.
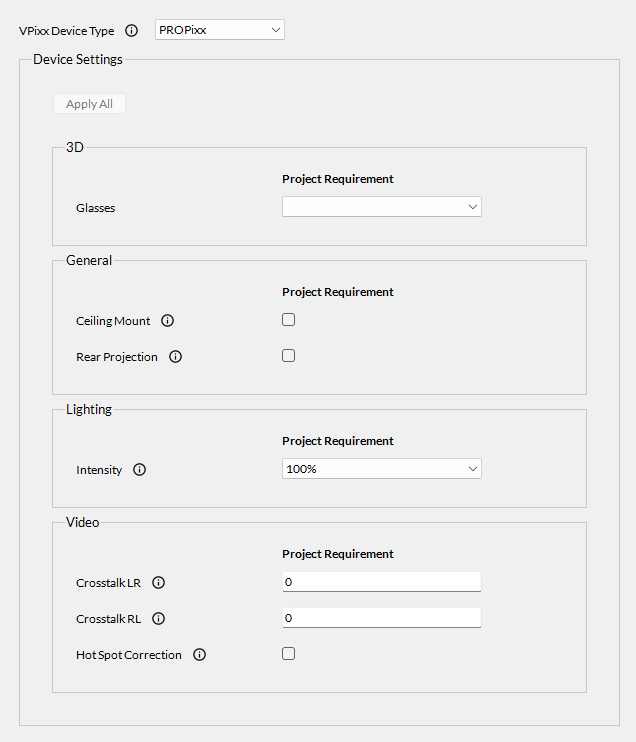
Glasses:
This option sets the device setting for 3D glasses compatibility. Currently, only the Passive (Polariser) option is available, allowing for stereoscopic 3D experiments using the DepthQ circular polariser. If you want to use Active glasses, you will need to specify that in the DATAPixx3 device settings. The 3D option is also automatically set up if you do 3D directly in LabMaestro.
Ceiling Mount:
If your projector is mounted on the ceiling of your laboratory setup, enable the correction of the projected image to ensure it displays correctly. If it is not ceiling-mounted, turn off this option.
Rear Projection:
Toggle on to adjust the projected image if your projector is behind the projection surface in your laboratory setup or if you are using mirrors.
Intensity:
Adjust the projector's lighting intensity. Available options include 100%, 50%, 25%, 12.5%, and 6.25%, along with two custom choices (custom1 and custom2). These adjustments modify the LED currents to maintain a D65 white point and a calibrated gamma of 1 while reducing the overall luminance.
Crosstalk LR:
Set observed 3D left-to-right eye crosstalk, using values ranging from 0 to 1. The PROPixx will automatically subtract this amount from the left eye image of the right eye image. This aims to eliminate most right-eye crosstalk in 3D applications. This feature only works in rendering mode RB3D.
Crosstalk RL:
Set observed 3D right-to-left eye crosstalk, using values ranging from 0 to 1. The PROPixx will automatically subtract this amount from the right eye image of the left eye image. This aims to eliminate most left eye crosstalk in 3D applications. This feature only works in rendering mode RB3D.
Hot Spot Correction:
Toggle on to enable automatic hotspot correction. Hotspotting occurs when light is not evenly distributed across the screen surface. It is characterized by non-uniform luminance or a halo effect on the part of the display. This will have no effect if you have not run the hotspot correction calibration.
Special Video Modes
Previously, the PROPixx settings allowed you to select the appropriate sequencer program for your experiment. This is now done automatically, depending on the type of experiment you choose. For example, selecting special modes will also change how your timeline operates.
You may find more information on these modes in this vocal guide.
DATAPixx3 / PROPixx Controller Mode :
Allows you to change the display mode. This will change the rendering mode and affect your timeline.
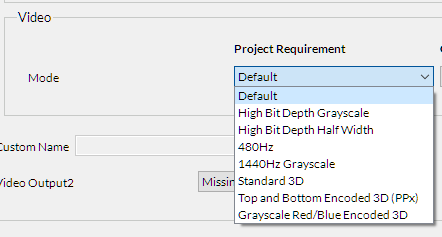
You may find more information on these modes in this vocal guide.
Once these settings have been defined correctly, you should be ready to use your projector in your project. For more information about the specific properties of the PROPixx device, including tips on optimizing your laboratory setup, refer to the VOCAL tutorials on the device.