-
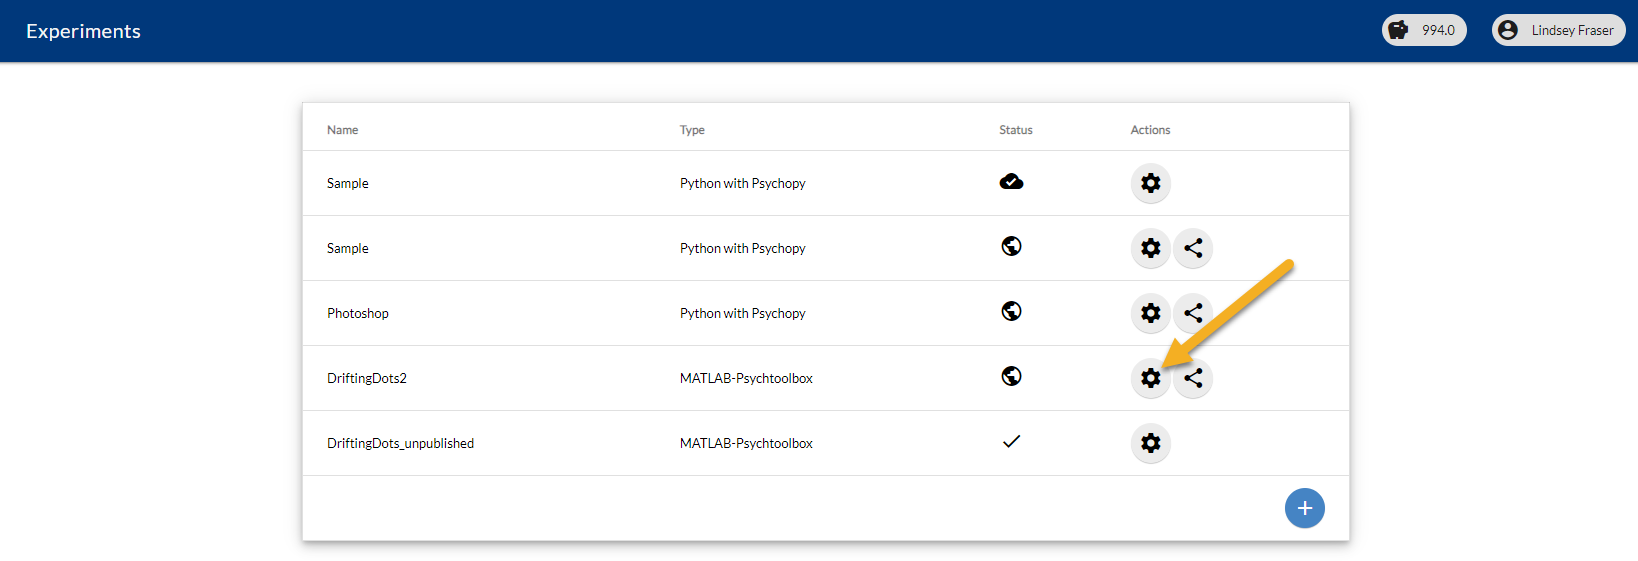
Before publishing the experiment, run a test to ensure that it runs on the Pack&Go platform. To run a test, navigate to the Experiment Management page for the study by clicking on the gear icon next to the study, then scroll down to the Test Experiment section:

The main Experiments page

The Test experiment section of the Experiment Management page
-
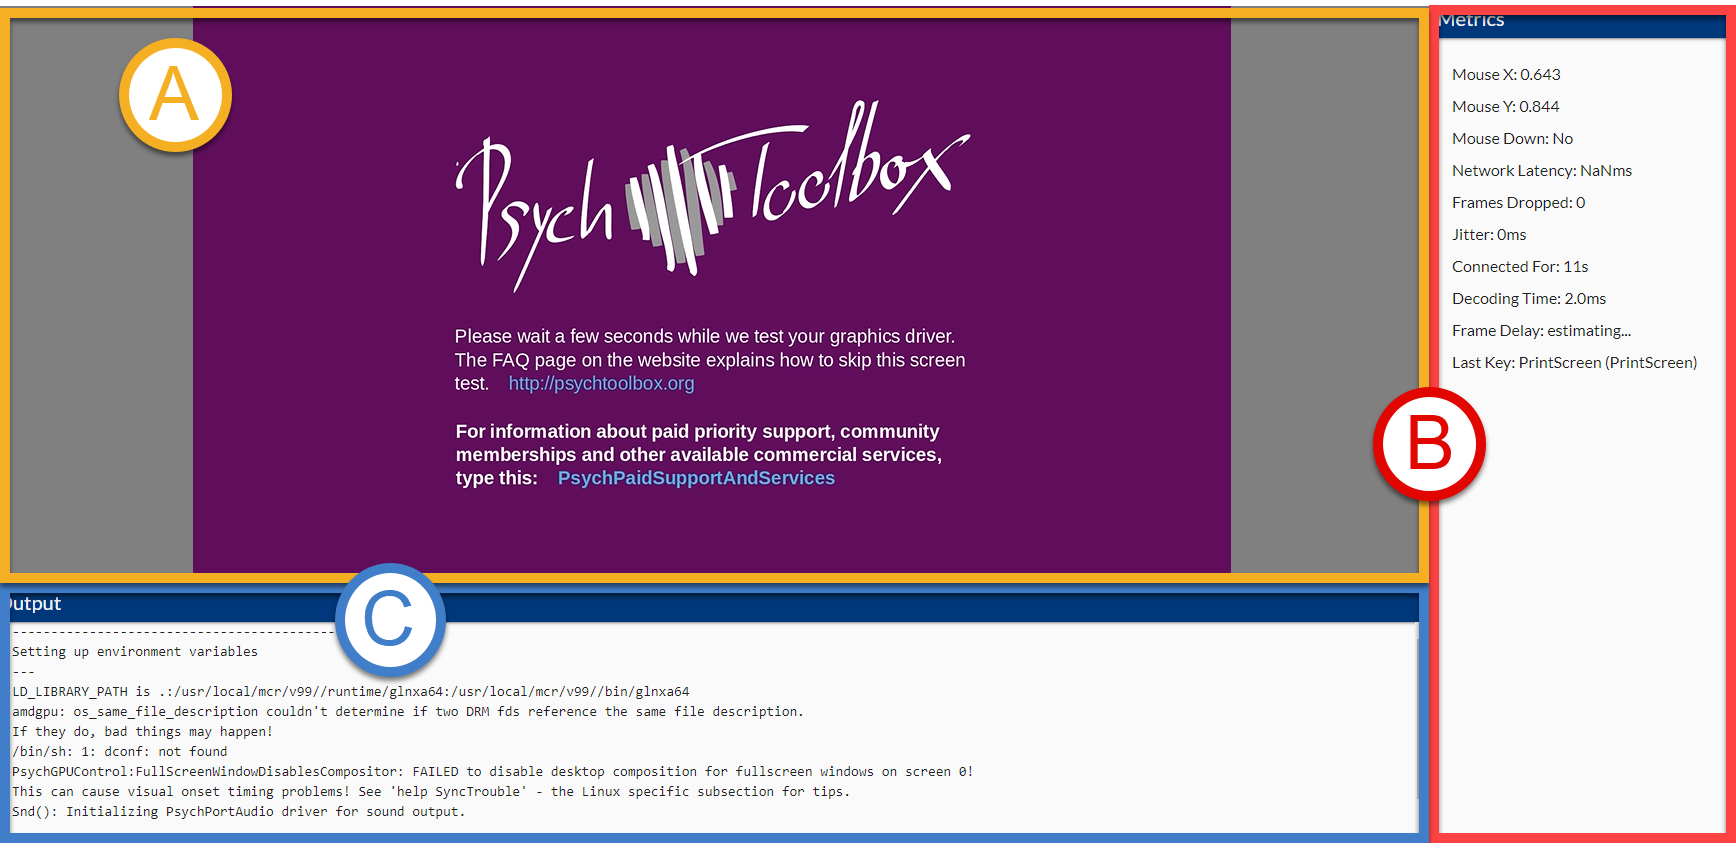
The test will launch in the testing interface:

The test interface -
Experiment Window. This will display your study. In a study session, this window will appear full screen to your participant.
-
Performance Metrics. This panel contains important diagnostic information, as well as user inputs like the x,y position of the mouse, and the last key pressed on the keyboard. For details on the meaning of each performance metric and how it is measured, see The Contents of the Session Results Folder.
-
Output. This is the output of the console, as you would see it on a local version of the test. The format and output is specific to your experiment platform. This content is saved in a log file included in the test results folder.
-
-
After completing the test, navigate back to the Scientist Portal and refresh the page. The test results can now be downloaded as a zip file (test-results.zip)

The Test experiment section of the Manage Experiment page
-
The results folder contains any results files generated by your study. It also contains the experiment log and results files provided by the Pack&Go platform (highlighted in the image below). For more details on these files, see The Contents of the Session Results Folder.
