So far, we have discussed how to communicate between local and device registers to control the settings of our VPixx device, and how to record the time of these communications effectively. In this section we will turn to how we can configure the DATAPixx I/O hub onboard memory to store and record data.
This storage can be configured by defining buffers with a certain address and size. There are several types of buffers, that can be used for different types of data. Schedules are management functions which control the flow of information to/from each buffer.
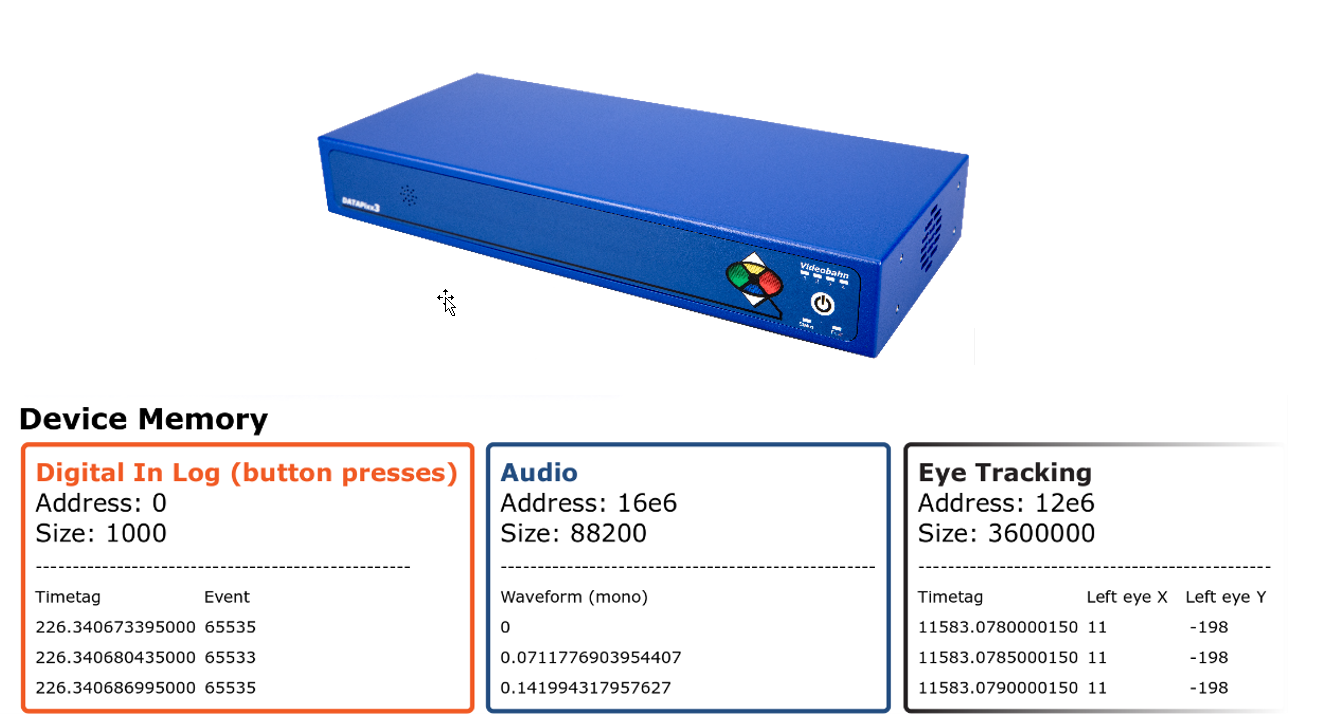
For example, you might have one buffer that is logging participant button presses via the digital input, a second buffer which contains an audio file for playback during the experiment, and a third buffer recording eye tracking data. Each of these buffers has a unique address in the device memory:
Below is a summary table of the types of schedules currently available with VPixx devices. For specific code syntax in MATLAB, enter ‘Datapixx’ in the command line for a full list of functions. In Python, you can search our online documentation here.
|
VPixx Buffer Types |
|
|---|---|
|
Audio system |
|
|
Name |
Description |
|
Audio |
Stores mono or stereo audio output for playback |
|
Microphone |
Records audio on either MIC IN or Audio IN |
|
Digital I/O |
|
|
Name |
Description |
|
Digital Input Log |
Only records changes in the state of Digital IN (max 16 bits) |
|
Digital Output |
Stores TTL signals for playback on Digital OUT (max 16 bits) |
|
Analog I/O |
|
|
Name |
Description |
|
Digital to Analog converter (DAC) |
Stores content for playback on Analog OUT pins (+/- 10V) |
|
Analog to Digital converter (ADC) |
Records input from Analog IN pins (+/-10V) |
|
Specialty systems |
|
|
Name |
Description |
|
PROPixx Tachistoscope |
Saves individual images to a buffer and shows them on the display. Simulates a tachistoscope |
|
TRACKPixx Eye Tracking |
Records a 20-column array of eye tracking data, at a rate of 2000 samples per second |
Not all schedules can be used with all VPixx devices. For example, the legacy “Lite” versions of our products do not have the audio or analog buffer types. Similarly, the TRACKPixx eye tracking schedule is only available to researchers who have one of our eye trackers and a DATAPixx3.
While there are several kinds of data that may be stored in a buffer, the strategy for managing buffers is the same. Below are some general guidelines for creating and managing buffer X:
Setup
-
(Playback only) Write content to the buffer
-
Set up a schedule to describe the type of data we expect the buffer to have, and other relevant parameters. If the buffer is going to be recording data rather than playing it, this is where the buffer address is specified
-
Write these changes to the device register to update the configuration of the device
Start recording/playback
-
Enter the command to start the schedule
-
Write this change to the device register to trigger start (optionally, you can synchronize it to video output using one of the special register commands)
Stop recording/playback
-
Enter command to stop the schedule
-
Write this change to the device register
Reading buffer contents
-
Perform a register write-read to get the current status of the device register
-
Get the schedule status, including number of new “frames ” of data in the buffer since the schedule started
-
Retrieve the desired number of frames from the buffer (note: the read buffer family of commands are a rare case of functions that do not require a register write or write-read; instead they execute immediately)
The functions for writing to buffers and setting up schedules often supply default memory addresses and sizes, so it isn’t necessary to set them yourself. However, if you are running multiple concurrent schedules it is always a good idea to double check you are not at risk of overlapping buffers, which will overwrite data.