Disabling dithering
Below are a few methods for disabling dithering. After each attempt, it is a good idea to run one of the tests listed in the previous section to double-check that dithering has been properly disabled.
Using Psychtoolbox
Psychtoolbox has invested serious time and effort developing tools for graphics pipeline management. If you have a copy of MATLAB (or Octave) with the Psychtoolbox installed on your test computer, you can run the following commands to attempt to turn off any dithering detected in your system.
Linux users should run PsychLinuxConfiguration prior to these steps to ensure a proper set up. You will need to reboot your system for any changes in configuration to take effect.
BitsPlusImagingPipelineTest; This first test will prompt you with which device you are using; enter ‘d’ for any VPixx hardware. The test will then launch a comprehensive graphics pipeline assessment. It will create a sequence of onscreen windows and may take a minute or so to complete. Summary output and any errors will be printed to the command window.
Following this test, you may also run:
BitsPlusIdentityClutTest([], 1); This will select a graphics card CLUT, and display content on the screen using the specified colour mapping. If everything is working well, you should see text that changes colours, with a central square that rotates quickly and smoothly. There should be no jittering or randomly shifting pixel values aside from the text.
If this is not what you see, you can try cycling to another CLUT by pressing the space bar, and try to find one which does not use any dithering. Once you hit Escape to exit the test, you must save the selected CLUT by answering ‘y’ to the prompt in the command window.
Using your graphics card control panel
Most graphics cards have a manufacturer-specific control panel or settings manager that allows you to manually adjust graphics output characteristics. Some of these managers have explicit options to disable/enable dithering. For example, NVIDIA X Server Settings for Ubuntu (using the NVIDIA proprietary drivers) has a pane under their GPU ‘Controls’ tab that lets the user turn off dithering via drop down menu.
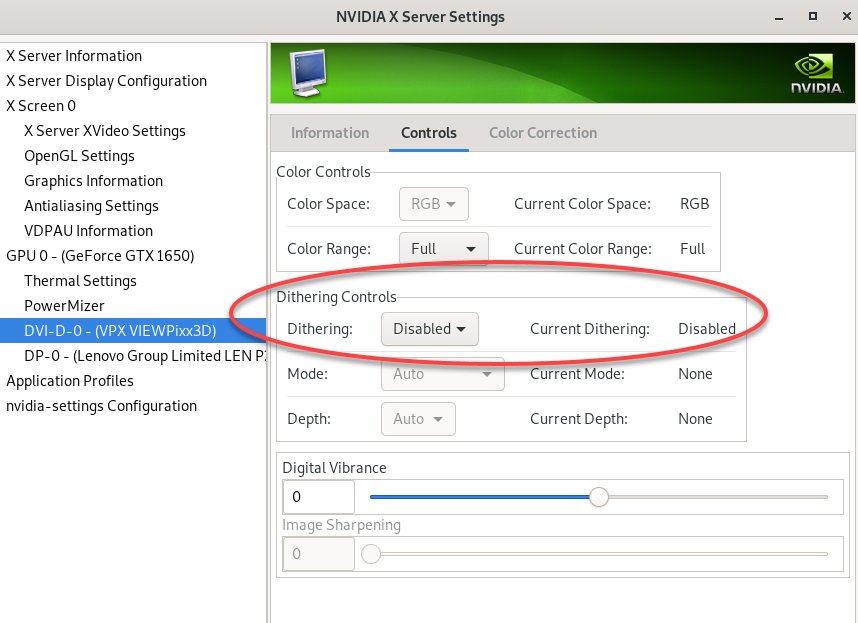
Example of dithering controls on NVIDIA’s X Server Settings. Note that for this particular model of graphics card (GTX 1650) this setting does not actually disable dithering, most likely because of bug in the graphics driver. It is always good to test for dithering even when it appears to have been disabled in the control panel. Image courtesy of Dr. Guillermo Aguilar.
The exact location of these options is highly graphics card and OS specific. You may need to dig around in your graphics card settings to find the option to disable dithering, if it exists.
Manually disabling dithering is not guaranteed to shut it off, especially if you have multiple screen configurations. We strongly recommend testing for dithering after changing your settings, to verify the change was actually applied to the configuration you are using in your experiment. You should also test to ensure the changes persist after a full system reboot, as they may revert to a default on restart.
In some cases, there may not be an explicit method for disabling dithering, but you can adjust your graphics card settings in order to effectively turn it off. This is true for a lot of Windows graphics card settings. Rather than having an explicit reference to dithering, they instead allow the user to set the bit depth under the ‘color settings.’ Setting your output colour depth to 8 bpc (bits per colour) can discourage your graphics card from trying to dither its way up to a higher bit depth.
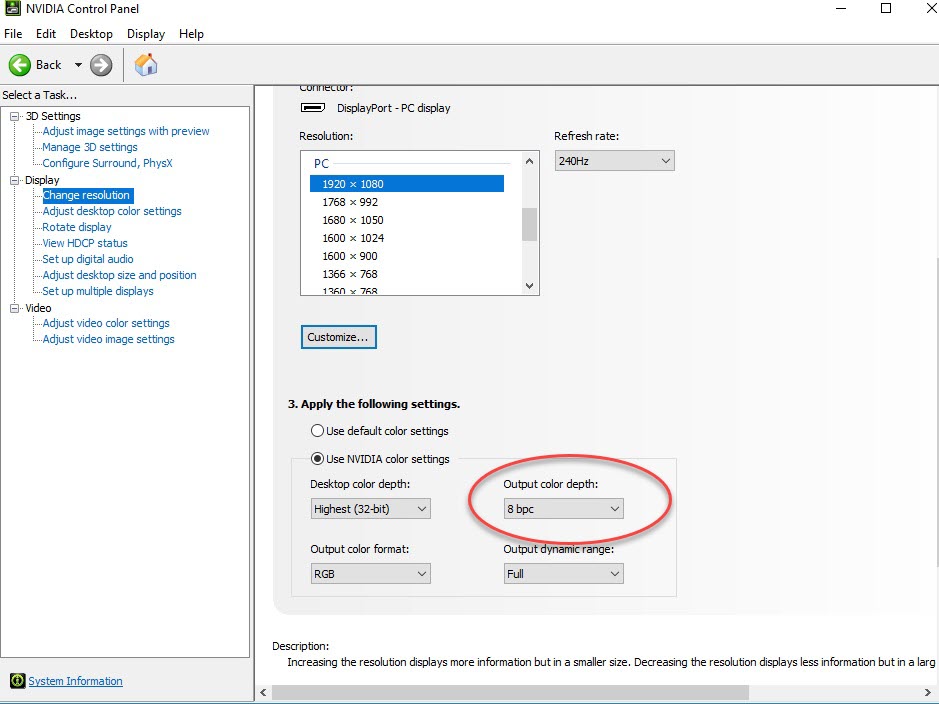
NVIDIA Control Panel with output colour depth set to 8 bits per colour.
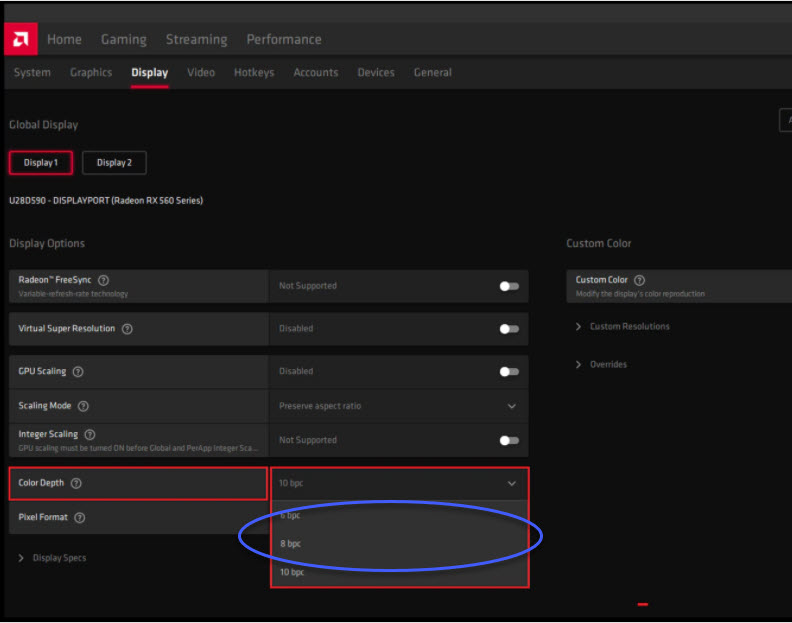
AMD Control Panel for Radeon RX series cards
Editing registry and configuration files (Windows and Linux)
Below are some more advanced methods of disabling dithering on Windows and Linux systems. Proceed with caution!
These methods vary by graphics card brand, and in some cases by the specific graphics card drivers the user has installed. The recommendations below require directly editing system configuration settings, and so the changes are more likely to persist following system reboot.
This section will be updated as more methods are tested and verified.
Disable dithering on AMD cards in Windows by editing the Windows Registry
Open the AMD Catalyst Control Center by right-clicking somewhere on the desktop. Navigate to:
Preferences -> Advanced View -> Information -> Software
And note down the 2D Driver File Path, which will tell you the registry location.Open the Windows Registry Editor and locate this path.
To disable dithering on DisplayPort, create a new 32-bit DWORD value called DP_DisableDither and set the value to 1.
To disable dithering on DVI, create a new 32-bit DWORD value called TMDS_DisableDither and set the value to 1.
Restart your machine for the changes to take effect.
Disable dithering on NVIDIA cards (with proprietary drivers) under Linux by editing the xorg.conf file
Switch to runlevel 3 using:
CODEteleinit 3Log in to the root account, and open the xorg.conf file
CODE/etc/X11/xorg.confUnder the ‘Screen’ section, add the following line:
CODEOption "FlatPanelProperties" "Dithering=Disabled"Save your changes. You can revert to runlevel 5 with
CODEtelinit 5
Have you successfully disabled dithering by another method, and want to share your recommendations? Send us a message at: support@vpixx.com