This experiment was developed in PsychoPy Standalone v2024.1.5 and tested in Windows 10. Bugs and feedback can be reported to support@vpixx.com.
Download the .psyexp for this example here: [Download]
This example implements a simple experiment structure with 5 repeated trials in PsychoPy Builder. It demonstrates the following:
-
How to invoke a calibration from within Builder
-
How to trigger TRACKPixx3 recording on a trialwise basis
-
How to send a synchronization trigger indicating the stimulus is onscreen
-
How to save TRACKPixx3 data collected while trigger is active
-
How to perform a simple drift check
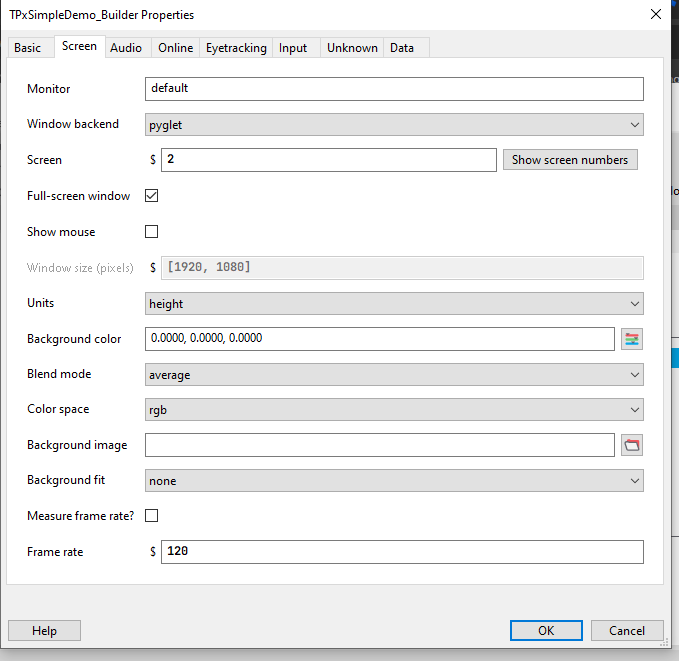
We recommend running this experiment with at least two screens: the stimulus display (connected to the DATAPixx3) and the experimenter display. In your experiment settings (the gear icon next to the monitor center) ensure your Screen is set to the stimulus display, typically display 2.
The experiment flow looks like this:

We will cover the contents of each block below. At the end of this page there is a video recording of the demo, with both experimenter and stimulus displays shown side-by-side.
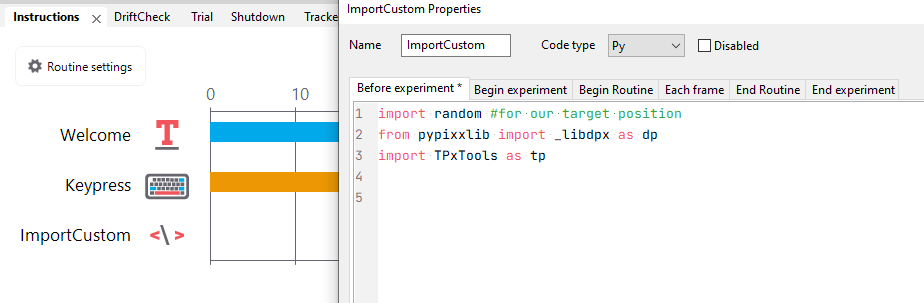
Instructions
In our first routine, we present simple instructions and wait for a keypress. This initial routine also includes a code component ImportCustom, set to Before Experiment, to import the extra modules we will need in our experiment:
TrackerCalibration
Next, we have a routine dedicated to our TRACKPixx3 calibration. It contains a single custom code component, set to Begin Routine, that calls our initial calibration routine from TPxTools. This routine will take over and steer the experimenter through the calibration, then hand control back to the Builder experiment when a calibration has been accepted.
The first thing the tracker calibration does is check for pixel identity passthrough. We have a whole VOCAL on what this is and why it is important (see What is Pixel Identity Passthrough?), but to put it simply, this check ensures that our planned triggers will do what we expect them to do during the experiment. If this fails, you can continue the experiment, but your collected data and drift check results may look strange or be absent.
After the pixel identity passthrough check, the GUI prompt for calibration parameters will appear on the experimenter’s screen:

Hover over each parameter with the mouse to see a description of the parameter at the bottom of the GUI.
Once the parameters are saved, the camera view will appear on the stimulus display. The experimenter can make the necessary adjustments (camera position, aperture, focus, iris size and optional search windows). Refer to step 2 on the first page of this VOCAL for more guidance.
Hitting enter will continue to the gaze point calibration. After this calibration is complete, the experimenter can view the calibration results, and accept them or trigger a recalibration. Once a calibration has been accepted, the TrackerCalibration routine will end.
The other component of this code block is the initialization of a variable myTrigger, which we will use to keep track of our stimulus onsets in the coming block.
WaitForKeyPress
This routine waits for the user to press a key to begin the trial block. This ensures that the trial block doesn’t suddenly appear and catch the participant by surprise.
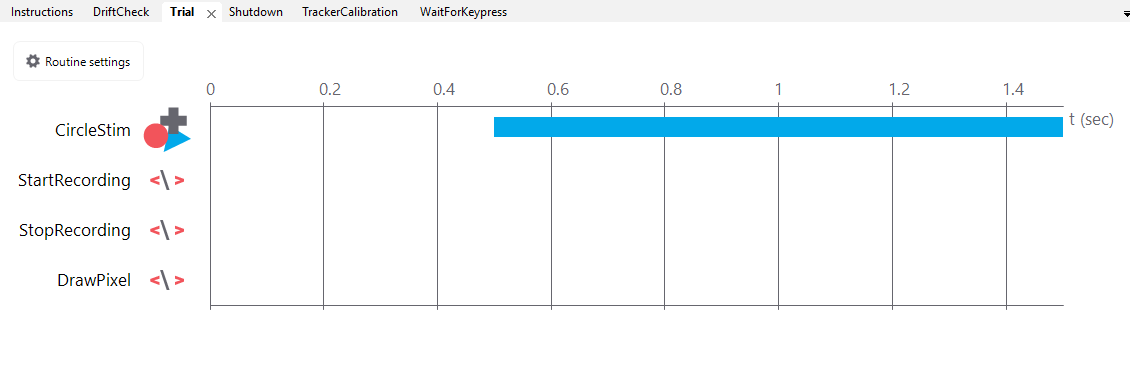
Trial
The trial routine contains the meat of the experiment. In this routine, we have a simple stimulus CircleStim, whose position is set randomly on each repeat, and three custom code components:
-
StartRecording executes at Begin Routine. This component contains a simple call to start the tracker recording. It also enables some hardware settings on the DATAPixx3 that allow it to use Pixel Mode, a special mode in which digital trigger values are determined by the colour of the R,G,B pixel in the top left corner of the display. Our hardware saves a copy of this trigger in the TRACKPixx3 data, allowing us to add event markers to our eye-tracking data without interrupting recording. We initialize the trigger and pixel value we need for this trial but don’t draw it yet.
-
DrawPixel executes at Each Frame. This short code component checks to see if CircleStim is currently being presented. If it is, we draw our Pixel Mode pixel too. This pixel will generate a trigger each frame it is visible, so this means the trigger will be on while our stimulus is onscreen.
-
StopRecording executes at End Routine. This code component stops the recording and imports the tracker data. Then, it trims the data down to the samples collected while our stimulus was onscreen (e.g. when our trigger was active). This is appended to a data file in the main folder of the experiment.
If you want to pass the Pixel Mode triggers to another piece of hardware, you can connect a custom cable between the DATAPixx3 digital output port and your receiver. The receiver will then accept a copy of all triggers, which you can use to segment other recording data and align it with your eye-tracking data.
If you need assistance with cabling, contact support@vpixx.com.
The Trial routine is set to loop 5x, which means we will collect 5 trials' worth of data.
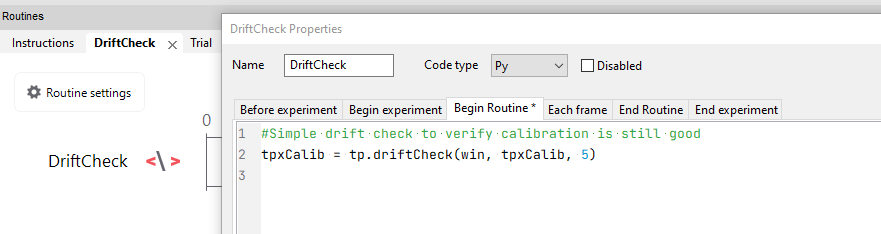
Drift Check
This routine demonstrates a simple drift check. Normally you wouldn’t need one after 5 trials; it is included here for demonstration purposes.
Like the TrackerCalibration routine, Drift Check is set to Begin Routine and contains a simple command to trigger a routine defined in TPxTools. The third argument of this command is used to determine the subset of targets you would like to present during the check.
If you pass a single value n, it will show all targets from 0 to n, from the original calibration.
If you pass a list of values, e.g., [1,3,5], it will show those specific targets.
If you pass nothing, or a value greater than the original number of calibration targets, the drift check will use all targets.
In this case, we request the first 5 targets from the initial calibration.
The drift check routine does not require any keypresses or activity from the participant. The instructions are presented briefly, and then the targets appear. Drift check results are presented on the experimenter’s screen (see video below). At this point, the experimenter can decide to trigger another gaze point calibration or continue to the next block.
If the experimenter chooses to recalibrate, the gaze point calibration executes as it did in the TrackerCalibration block.
The Drift Check routine ends on one of the following conditions:
-
The experimenter accepts the drift check by clicking ‘Continue,’ or,
-
The experimenter starts a recalibration and accepts the results.
Shutdown
PsychoPy builder takes care of its own shutdown procedures. However, we still need to shut down our TRACKPixx3 and our Pixel Mode settings. This is done with a custom code block ShutdownTracker, called at Begin Routine. This routine also contains a thank-you message and waits for a keypress to close the program.
Video demo