Overview
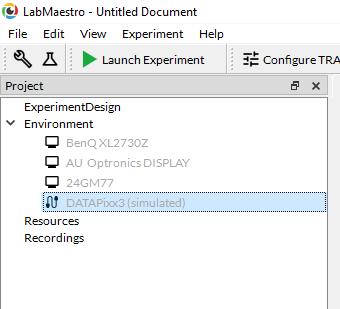
This page provides a conceptual introduction to the “Environment” in LabMaestro (in the Project panel), where all connected displays and VPixx devices are listed.
After reading this guide, you will have an understanding of the differences between Displays and Devices in LabMaestro, how to add them to a LabMaestro project, and how to configure various hardware settings for use, either within or outside of LabMaestro projects.
VPixx Devices
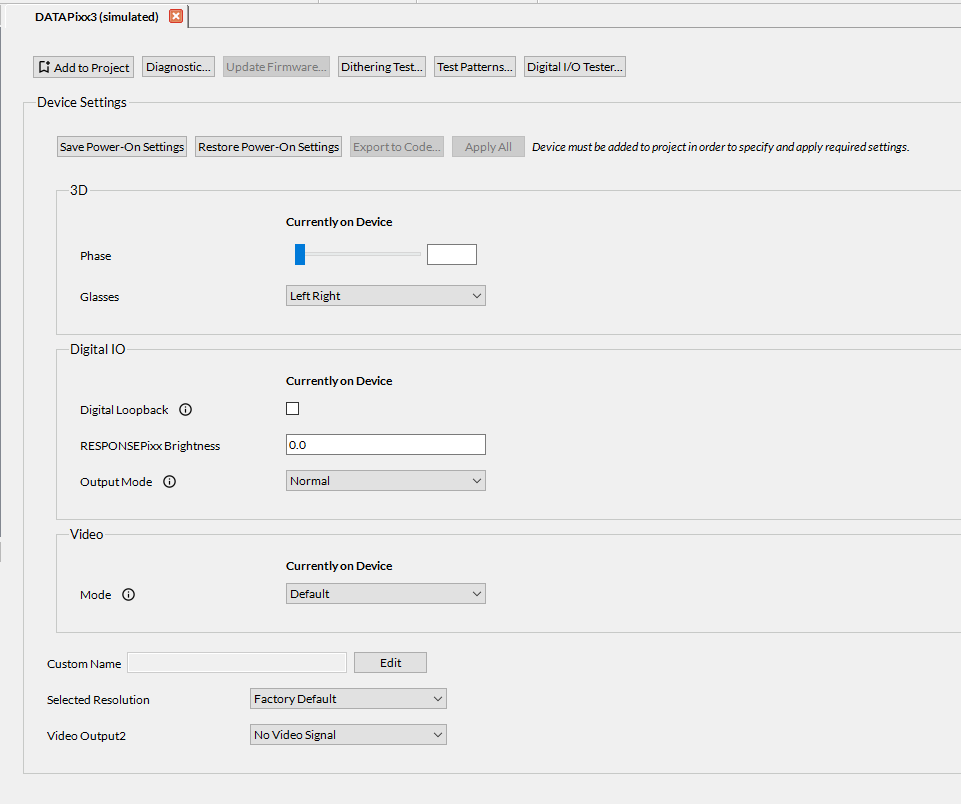
In LabMaestro, “Devices” refers to any VPixx hardware connected to the computer via USB. This includes our VIEWPixx line of research-grade monitors, the PROPixx projector, or our DATAPixx3 video I/O hub and data acquisition system. One exception to this rule is our TRACKPixx3 eye tracker, which is not directly connected to the computer but is detected and accessed via its connection to the DATAPixx3. All VPixx devices have a “Device Settings” menu that lets you configure various features and settings. You can access the device settings by double-clicking a VPixx device, which opens the “Device Settings” menu for that device.
Single-clicking a VPixx device opens a Properties panel for that device on the right-hand side of the window. The Properties panel gives information about the device.
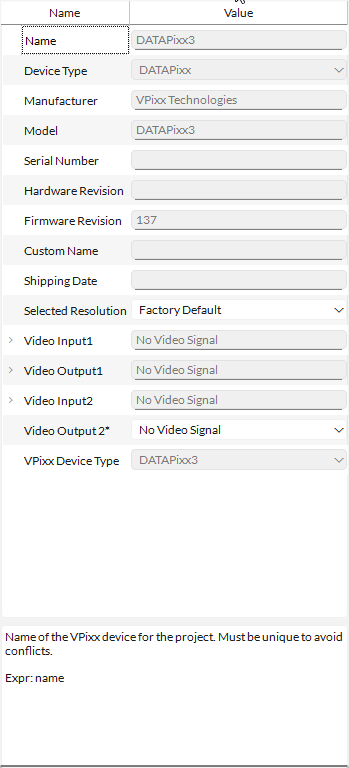
The following table summarizes the different pieces of information available for VPixx devices in the Properties panel:
|
Name |
Description |
|---|---|
|
Device type |
The type of VPixx device (e.g., DATAPixx, Monitor, Projector) |
|
Manufacturer |
The name of the manufacturer (VPixx Technologies) |
|
Model |
The model of the device (e.g.DATAPixx, DATAPixx2, DATAPixx3, VIEWPixx, VIEWPixx/EEG, PROPixx, VIEWPixx3, TRACKPixx) |
|
Serial Number |
The serial number of the device |
|
Hardware Revision |
The hardware revision number of this device |
|
Firmware Revision |
The current firmware revision of this device |
|
Custom Name |
The custom name that the user has given this device |
|
Shipping Date |
The date that the device was shipped |
|
Selected Resolution |
This information is only available for Device Types: monitor, projector, and DATAPixx. It is the current video resolution selected for this device. |
|
Video Input |
This information is only available for Device Types: monitor, projector, and DATAPixx. The current video input resolution and frame rate. |
|
Video Output |
This information is only available for Device Types: monitor, projector, and DATAPixx. The current video output resolution and frame rate. |
|
Audio Input |
Available for devices that support audio signals. Allows you to define the source of audio inputs. |
|
Audio Output |
Available for devices that support audio signals. Allows you to specify the audio output speaker. |
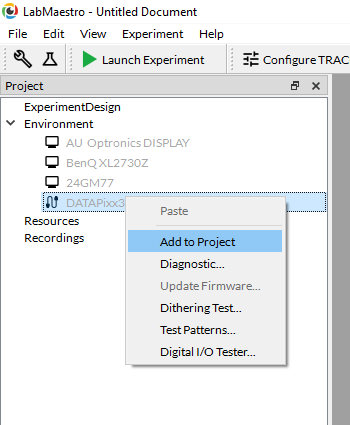
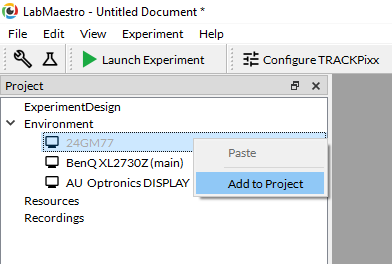
By right-clicking on a VPixx device, you will see several options available:
The following table describes each of the options:
|
Option |
Description |
|---|---|
|
Add to Project |
Add the device to the LabMaestro Project |
|
Diagnostic |
Open the Diagnostic window to do self-tests or register read |
|
Update Firmware |
Update the firmware if a newer version of the device firmware is available |
|
Dithering Test |
Run a Dithering test to see whether your graphics card is altering pixel values. |
|
Test Patterns |
Display various test patterns on the VPixx Device/Display |
|
Digital I/O Tester |
Open the Digital I/O tester, which allows you to read the Digital Inputs and set the states of the Digital Outputs for testing purposes. |
Displays
In LabMaestro, “Displays” refers to the type of display (e.g., monitor or projector) connected to your computer/graphics card via a video cable; this includes third-party displays as well as VPixx displays.
The following page on Displays and Monitors details how to add a display to your LabMaestro project, and the information available in the Display Properties panel.