Introduction
This page covers how to use the TRACKPixx3 Eye Tracker with LabMaestro, as well as how to simulate a tracker using the LabMaestro Simulator.
Before you begin, you should:
-
Have LabMaestro installed and running
-
Have the TRACKPixx3 powered on and connected to your PC via a DATAPixx or VPixx I/O hub.
-
Be familiar with the Environment and Devices Overview
Configure the Device in your Environment
Your TRACKPixx3 device is detected automatically by LabMaestro when you connect it to your computer. You can see it under the Environment section of the Project panel. Double-click on the device under the Environment to open the Device Settings menu. You can add the device to your project by right-clicking or from the properties window.
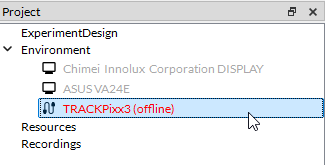
If your device is not automatically detected by the LabMaestro software, please ensure your device is turned on and connected to your computer. Also, please ensure your DATAPixx firmware is up to date.
TRACKPixx3 Properties
|
Setting |
Description |
Options |
|---|---|---|
|
General |
||
|
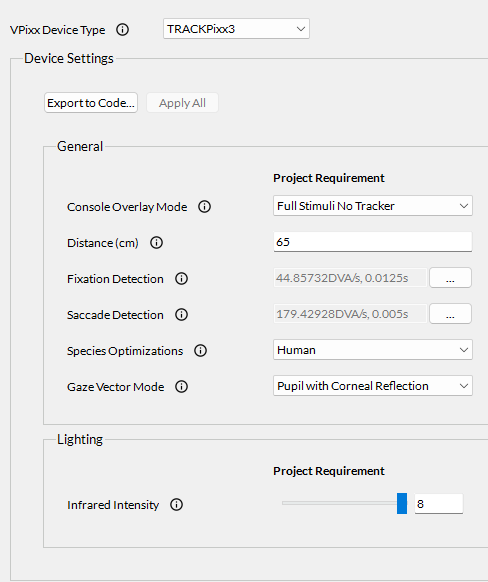
Console Overlay Mode |
Define the console overlay mode. When you connect a 27” monitor to the “DisplayPort Out 2” port on the DATAPixx3, it determines the format of both the stimulus display and TRACKPixx3 camera passthrough view. |
|
|
Distance (cm) |
The distance, in cm, between the TRACKPixx3 camera and the eyes of the participant. In tabletop TRACKPixx3 setups, the recommended distance is often around 60 cm. |
Positive floating-point value |
|
Fixation Detection |
Sets the arguments required to generate online fixation flags. Two arguments need to be set:
|
Positive floating-point values |
|
Saccade Detection |
Sets the arguments required to generate online saccade flags. Two arguments need to be set:
|
Positive floating-point values |
|
Species Optimizations |
Allows the selection of different tracking modes depending on the species tested. |
|
|
Gaze Vector Mode |
Select the desired gaze vector mode, used to compute the gaze position. |
|
|
Lighting |
||
|
Infrared Intensity |
Set an infrared illuminator intensity. Lowering the IR intensity (or reducing the TRACKPixx3 aperture) might improve eye-tracking quality when spurious corneal reflections are generated on the cornea. |
0-8 range for humans. 0-15 range for non-human primates. |
Preparing the TRACKPixx3 for Data Collection
Here is an overview of the TRACKPixx3 configuration interface in the LabMaestro application:
-
Configure TRACKPixx. This option opens the TRACKPixx3 configuration window.
-
Sleep/Wake TRACKPixx. This option wakes your tracker to ready it for use. If your tracker is awake, it is put into rest mode instead.
-
Calibrate. Define the desired behaviour of the TRACKPixx3 calibration. For more information, see this page.
-
Record. Start a recording of gaze data.
-
Capture. Perform a screen capture of the tracker camera footage.
-
View. Customize the desired view.
-
Iris Expected Size. Adjust the size of the iris region using a slider.
-
Search Limits Enabled. Activate to enable search limits, constraining the eye detection algorithm to specific regions of the camera feed.
-
Detect Optimal Settings. In LabMaestro version 1.10, we have added a new way to set up your TRACKPixx for a new subject. When clicking this option, your participant will be asked to look straight ahead. A detection algorithm will automatically run on the TRACKPixx visual recording to locate the eyes, define optimal search limits, and estimate the expected iris size. After this, a bar at the bottom will help you hone the TRACKPixx's focus to perfection. Once you are done, you can click the Stop Focus Tuning button to stop the focus bar from appearing. If needed, you can then manually adjust some of these parameters to your liking.
Note that this option does not calibrate the device. You will need to start a calibration routine following this. We recommend using Detect Optimal Settings before starting the calibration to ensure the calibration is performed with the same settings as the experiment.
Using the TRACKPixx During an Experiment
There are multiple LabMaestro functions tailored for use with a TRACKPixx3 eye tracker. These include:
-
A variety of Command Components tied to the TRACKPixx3, allowing you to record, calibrate and validate Eye Tracker data.
-
The Tracker Object allows you to access gaze position in real-time during your experiment.
-
Various Tracker Functions to perform operations or collect data on gaze position or behaviour.
To familiarize yourself with various use cases of the TRACKPixx3 during experiments, please see our Template Experiments demonstrating potential uses of your tracker.
Simulating a TRACKPixx3 Using the LabMaestro Simulator
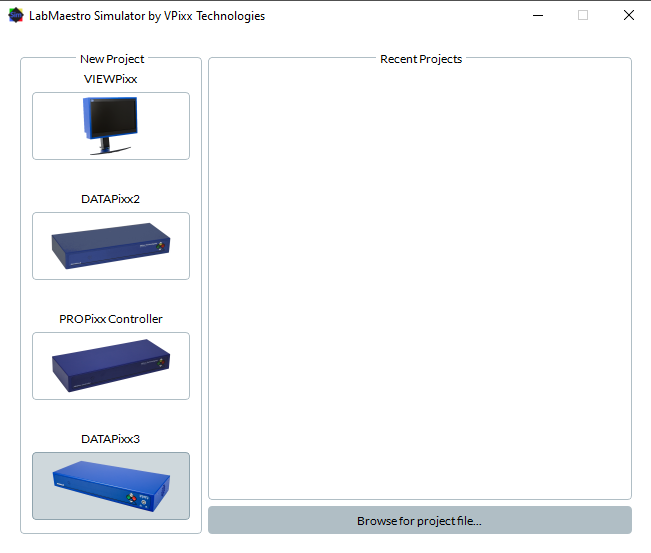
To simulate a TRACKPixx3, you will first need to launch the LabMaestro Hardware Simulator by clicking the “Simulator” button.

After the simulator launches, under New Project, select DATAPixx3 to create a new project simulating a DATAPixx3.
Now that a DATAPixx3 is being simulated, the next step is to simulate the TRACKPixx3 by selecting the VideoBahn option under the Port dropdown menu in the Properties panel on the right:
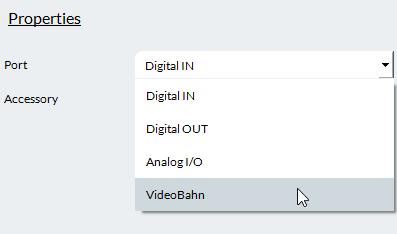
And then selecting the TRACKPixx3 option under the Accessory dropdown menu:
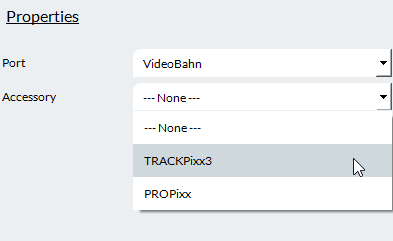
Now the TRACKPixx3 is being simulated; this is useful for testing code that uses TRACKPixx-specific commands and for ensuring they do not cause errors.
When testing an experiment with a simulated TRACKPixx3, you can simulate gaze behaviour by moving your mouse. All functions and calls to gaze positions will instead use the mouse position when using a simulated TRACKPixx3.
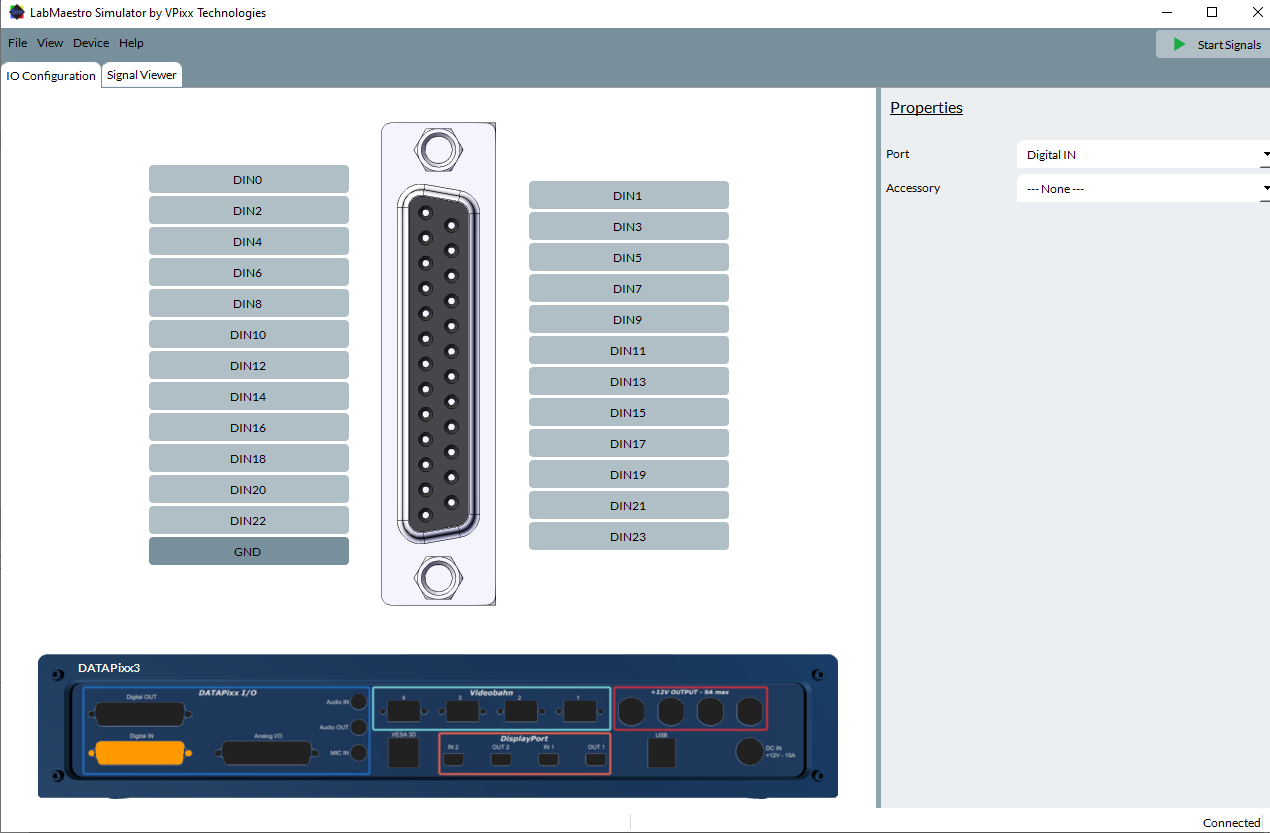
If you wish to simulate any I/O functionalities (e.g., digital or analog I/O), you will need to use the simulated DATAPixx3. You can configure the properties of these simulated I/O features in the IO Configuration tab:
Related Links
Calibration with the TRACKPixx3