Overview
This page covers how to configure and use the PROPixx projector in LabMaestro, as well as how to simulate a PROPixx in the device simulator.
Before you begin, you should:
-
Have LabMaestro installed and running
-
Have the PROPixx powered on and connected to your PC via USB and video cable
-
Be familiar with the Environment and Devices Overview
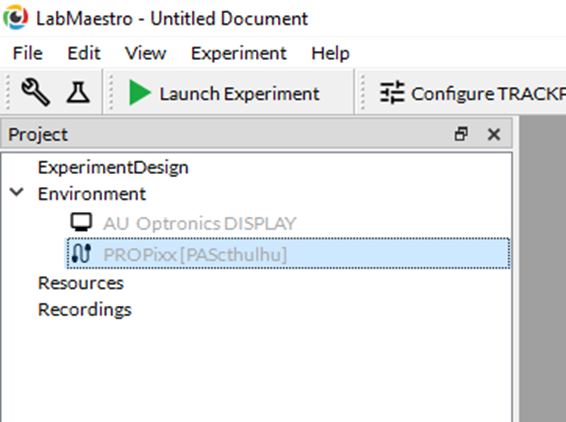
Configure the device in your environment
Your PROPixx is automatically detected as a device by LabMaestro. Double-click on the device under the Environment to open the Device Settings menu:
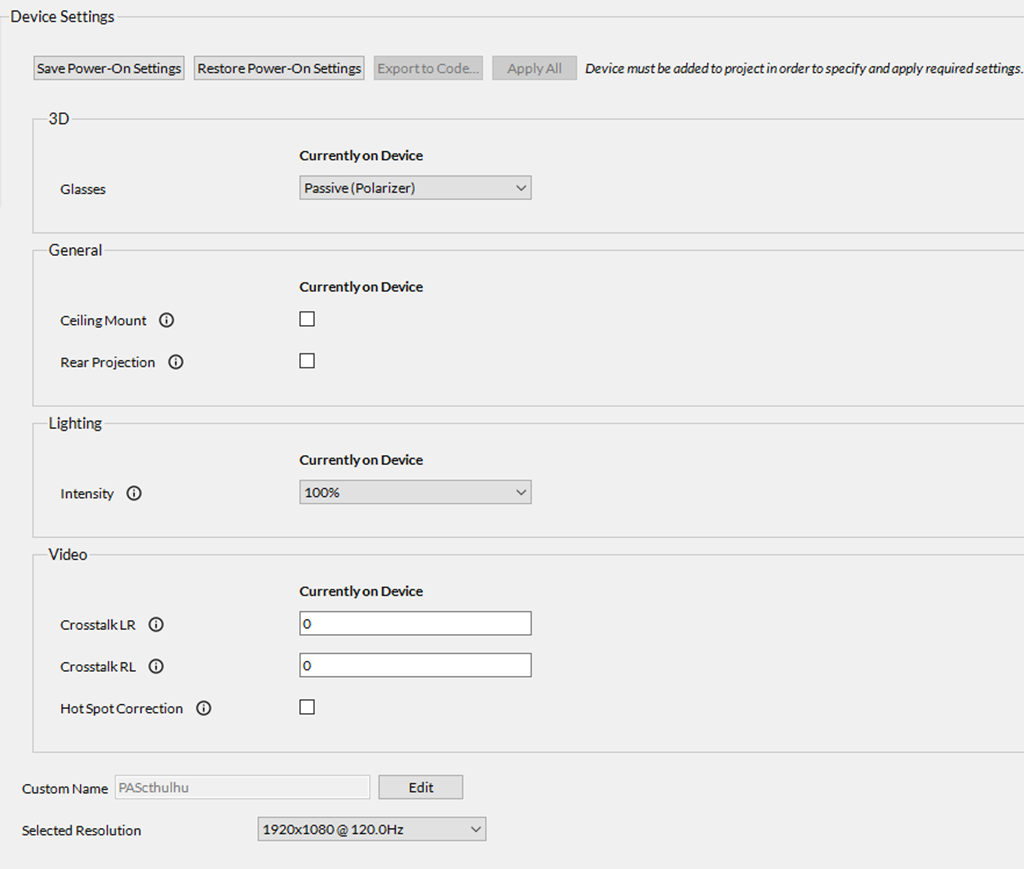
In the Device Settings menu for the PROPixx, you will find the following device settings options:
|
Setting |
Description |
Options |
|---|---|---|
3D
|
||
|
Glasses |
Select the type of 3D glasses to drive when the PROPixx is set in one of its 3D video modes. See the following guide to familiarize yourself with 3D Projection with the PROPixx and 3D Polarizer |
|
General
|
||
|
Ceiling Mount |
Enable/disable Ceiling Mount projection mode; in Ceiling Mount mode, the image is top-bottom inverted/upside-down (suitable for when the projector is mounted upside-down, on the ceiling) |
Enable or Disable (default = disabled) |
|
Rear Projection |
Enable/disable Rear Projection mode; in Rear projection mode, the image is left-right inverted (suitable for when the projector is projecting from behind a rear-projection screen) |
Enable or Disable (default = disabled) |
Lighting
|
||
|
Intensity |
Set the brightness of the LEDs |
|
Video
|
||
|
Crosstalk LR |
Set observed 3D left → right-eye crosstalk (range: 0-1). The PROPixx will subtract this amount (proportion) of the left-eye image from the right-eye image. This should eliminate most right-eye crosstalk in 3D applications; only supported in RB3D mode. |
Value from 0 to 1 (default = 0) |
|
Crosstalk RL |
Set observed 3D right→ left-eye crosstalk (range: 0-1). The PROPixx will subtract this amount (proportion) of the right-eye image from the left-eye image. This should eliminate most left-eye crosstalk in 3D applications; only supported in RB3D mode. |
Value from 0 to 1 (default = 0) |
|
Hot Spot Correction |
Enable/disable hot spot correction |
Enable or Disable (default = disabled) |
|
Additional settings |
||
|
Custom Name |
The custom name given to the device by the user |
Any string of text input by the user (default = none) |
|
Selected Resolution |
The resolution of the PROPixx. You will be prompted to reset your device for the change to take effect. |
|
Device Calibration
Simulating a PROPixx with the LabMaestro Hardware Simulator
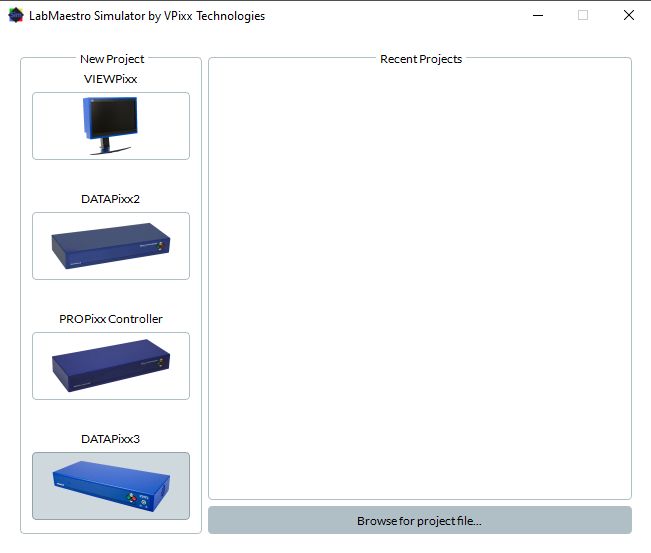
To simulate a PROPixx, you will first need to launch the LabMaestro Hardware Simulator by clicking the “Simulator” button.

After the simulator has launched, under “New Project”, select the DATAPixx3 to create a new project simulating a DATAPixx3.
Now that a DATAPixx3 is being simulated, the next step is to simulate the PROPixx by selecting the “VideoBahn” option under the “Port” dropdown menu in the “Properties” panel on the right:
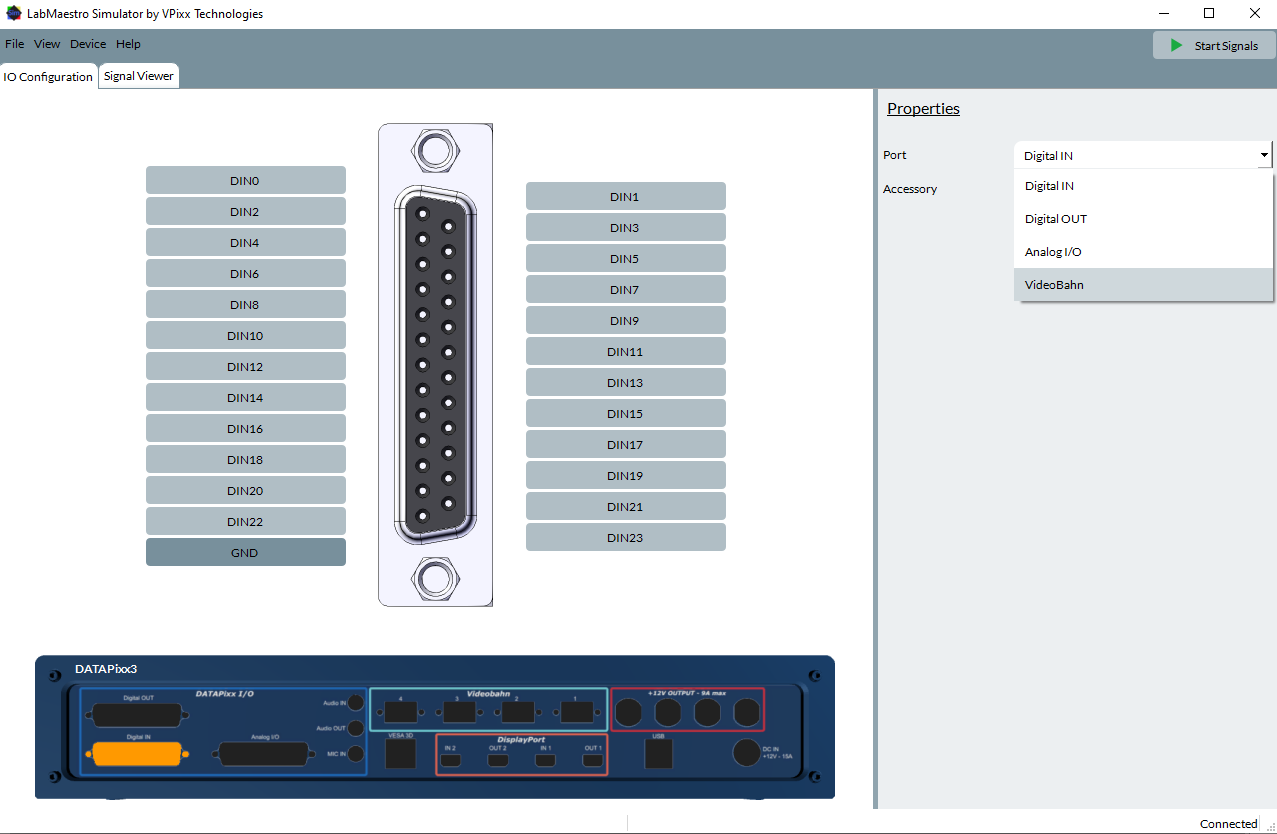
And then selecting the “PROPixx” option under the “Accessory” dropdown menu:
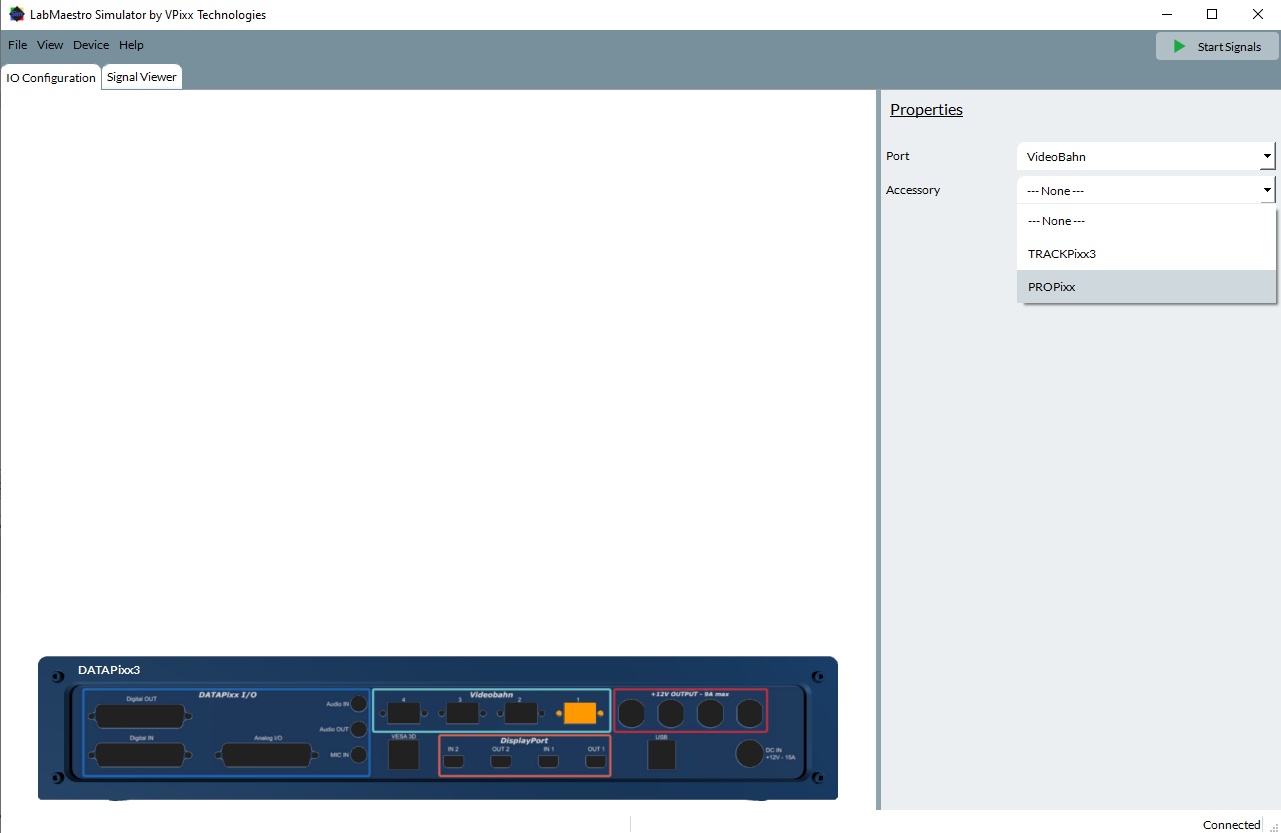
Now the PROPixx is being simulated; this is useful for testing code that uses PROPixx-specific commands and ensuring they do not cause errors.
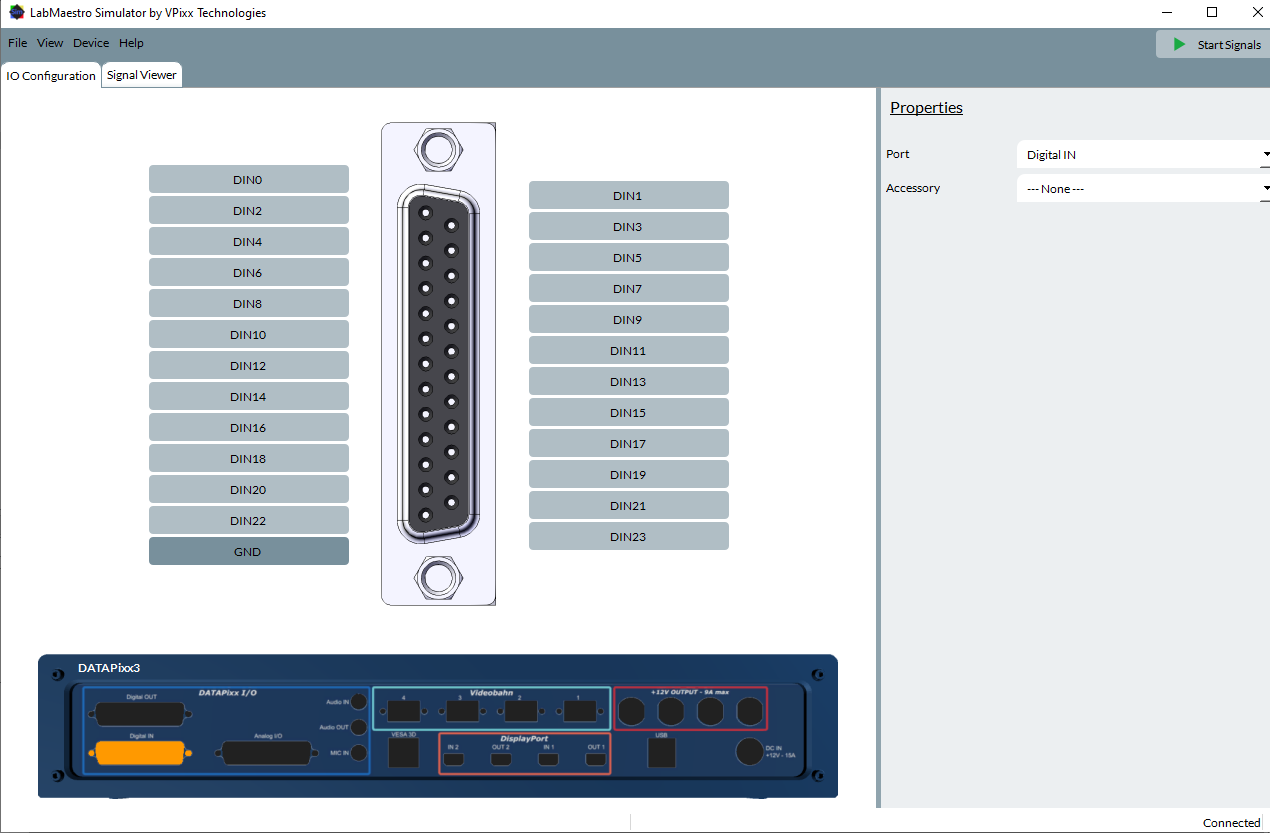
If you wish to simulate any I/O functionalities (e.g., digital or analog I/O), you will need to use the simulated DATAPixx3. The properties of these simulated I/O features can be configured in the “IO Configuration” tab:
For general information on simulating devices and I/O signals, see [link soon]