
To enable the Keystone Correction GUI in LabMaestro, your hardware must have an additional license. Please contact support@vpixx.com if you experience keystone artifacts with your projector and require a software-based correction.
Overview
As of Version 13.0, LabMaestro now offers users with an additional license the option to apply a correction for Keystone Artifacts that may occur depending on your projector setup.
Before you begin, you should:
-
Have LabMaestro installed and activated
-
Have the additional Keystone Correction License
-
Have your PROPixx connected to your computer
What is the Keystone Effect?
The keystone effect refers to the apparent image distortion that occurs when you project onto an angled surface, or when the projector is angled relative to the projection surface. Generally, this causes the resulting image to appear trapezoidal instead of rectangular.

In most cases, you can correct keystone effects by adjusting the position/angle of the projector or screen, sometimes with a lens shift. However, in some cases, projector positioning has strict requirements (such as in an MRI/MEG facility, where a projector must often be placed outside the shielded room and project through a waveguide). This can make it impossible to eliminate keystone artifacts completely. To fix this, a software-based correction can purposefully distort the image to compensate for visible keystoning, resulting in a flat, rectangular projection.
Keystone Correction with LabMaestro
To enable keystone correction on your device, add it to your LabMaestro project, then click Keystone Correction. LabMaestro will warn you if you do not have the required license to access this feature.
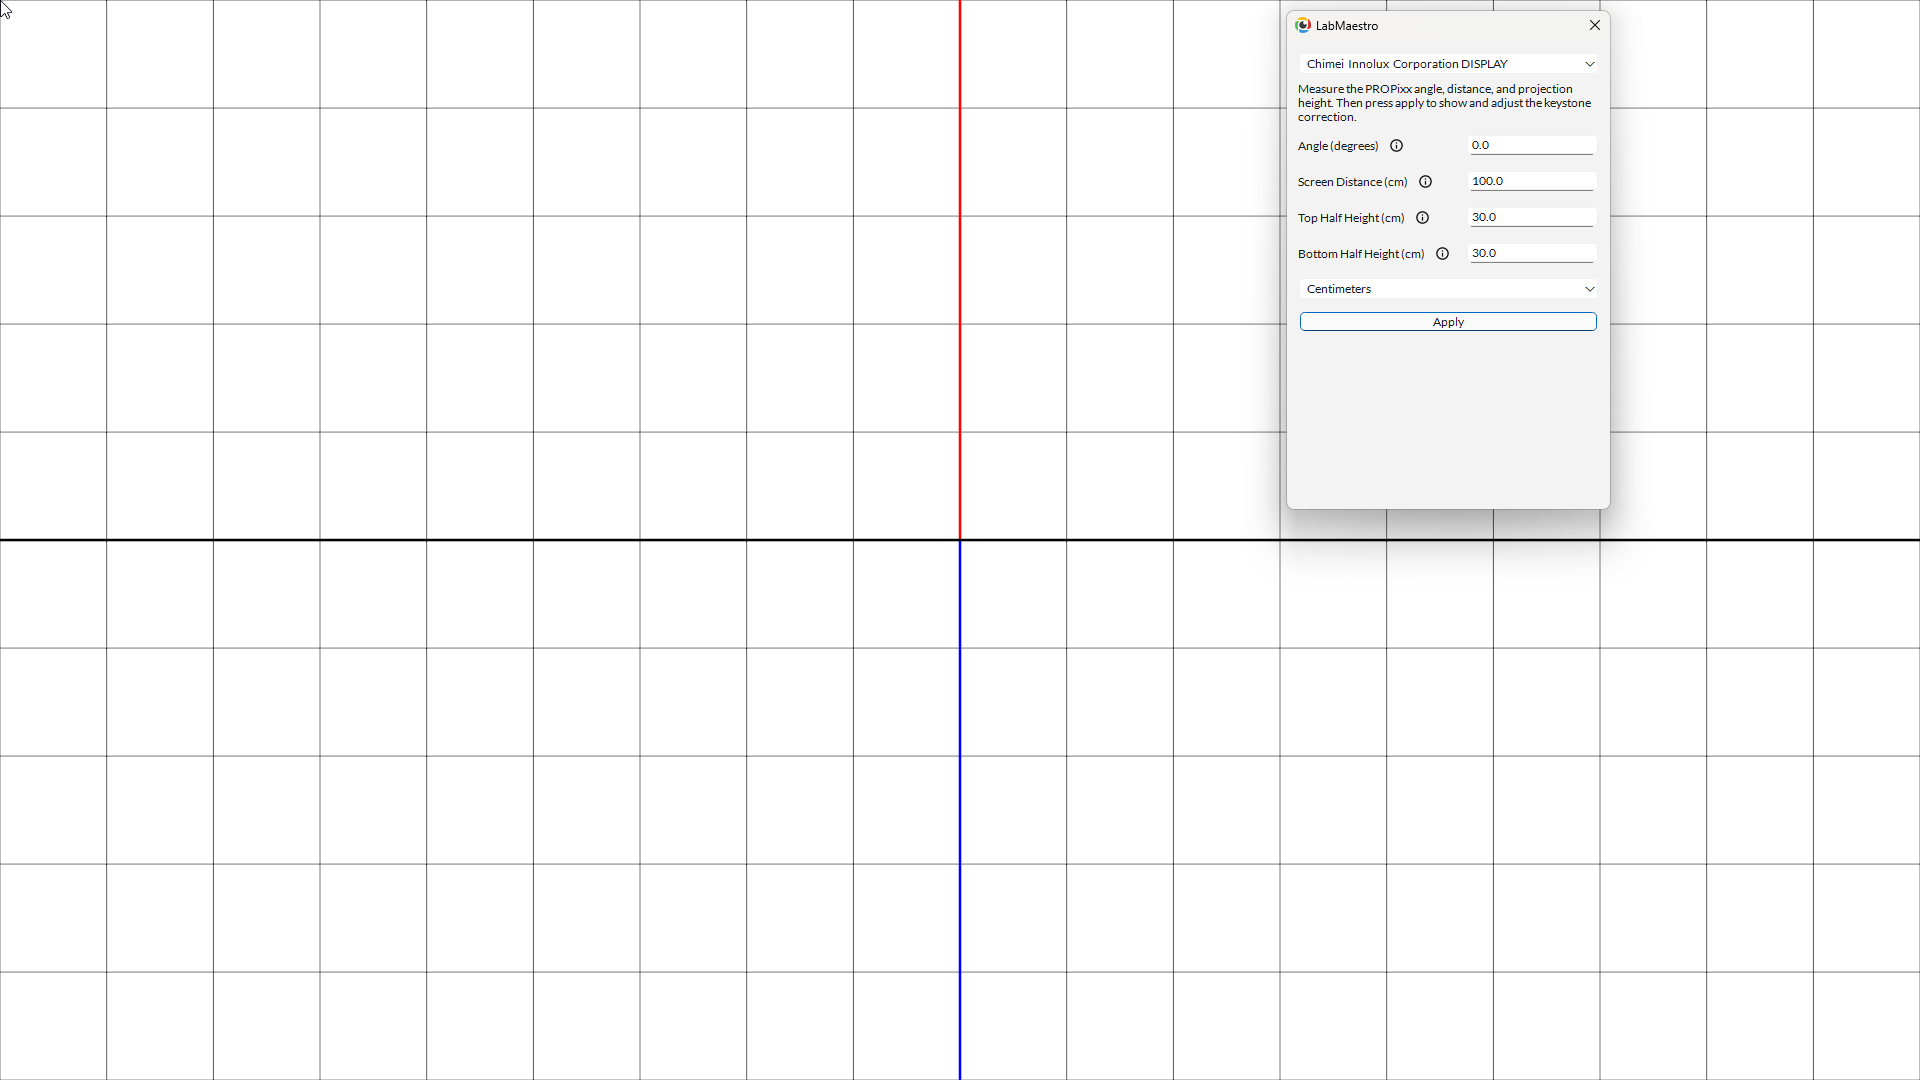
Your PROPixx should now display a reference grid to collect certain measurements. You must provide the following:
-
Angle (Degrees): Angle of tilt of PROPixx in degrees. Downward tilt requires a negative value.
-
Screen Distance (cm): Distance between the lens and the centre of projection (intersection between the red and blue lines).
-
Top-half Height (cm): Length of the top half of projection (drawn in red).
-
Bottom-half Height (cm): Length of the bottom half of projection (drawn in blue).
Optionally, you can also provide all distances in inches. Simply select your preferred measurement unit before entering your measurements and clicking Apply.
Once you click Apply, the software will apply the software correction to your image. Two sliders will then appear for you to fine-tune the correction and optimize your image. You can also export your correction values to MATLAB or Python code for use with our software APIs. Once you are done, simply close the contextual window and resume using LabMaestro as usual.