
Introduction
This page covers how to use the TRACKPixx Mini Eye Tracker and its associated IO Hub with LabMaestro.
Before you begin, you should:
-
Have LabMaestro installed and running
-
Have the TRACKPixx Mini powered on and connected to your PC via its I/O hub.
-
Be familiar with the Environment and Devices Overview
Configure the Device in your Environment
Your TRACKPixx Mini device is detected automatically by LabMaestro when you connect it to your computer. You can see it under the Environment section of the Project panel. Double-click on the device under the Environment to open the Device Settings menu. You can add the device to your project by right-clicking it or by opening the properties window.
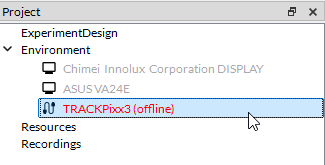
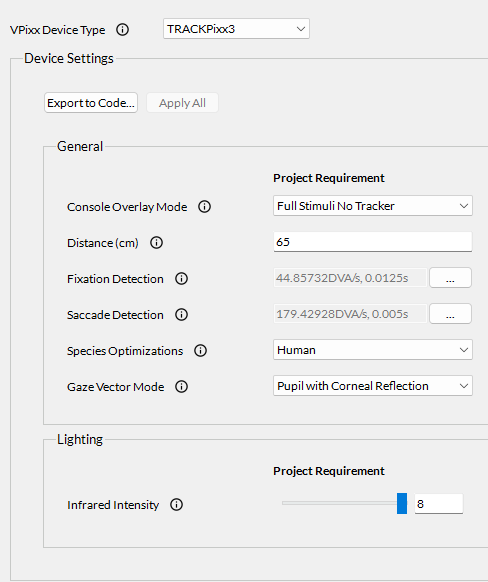
If your device is not automatically detected by the LabMaestro software, please ensure your device is turned on and connected to your computer. Also, please ensure your DATAPixx firmware is up to date.
TRACKPixx Mini Properties
The TRACKPixx Mini has no editable properties.
IO Hub Properties
|
Setting |
Description |
Options |
|
RESPONSEPixx Brightness |
Set the LED brightness on the buttons of a standard RESPONSEPixx button box connected to the digital input. |
0.0-1.0 (default = 0.0) |
Preparing the TRACKPixx Mini for Data Collection
Here is an overview of the TRACKPixx configuration interface in the LabMaestro application:
-
Configure TRACKPixx. This option opens the TRACKPixx configuration window.
-
Sleep/Wake TRACKPixx. This option wakes your tracker to ready it for use. If your tracker is awake, it is put into rest mode instead.
-
Calibrate. Define the desired behaviour of the TRACKPixx calibration. For more information, see this page.
-
Record. Start a recording of gaze data.
-
Capture. Take a screenshot of the tracker camera footage.
-
View. Customize the desired view.
-
Iris Expected Size. Adjust the size of the iris region using a slider.
-
Search Limits Enabled. Activate to enable search limits, constraining the eye detection algorithm to specific regions of the camera feed.
Using the TRACKPixx Mini During an Experiment
There are multiple LabMaestro functions tailored for use with a TRACKPixx Mini eye tracker. These include:
-
A variety of Command Components | Eye Tracker Commands tied to the TRACKPixx, allowing you to record, calibrate and validate Eye Tracker data.
-
The Tracker Object allows you to access gaze position in real-time during your experiment.
-
Various Tracker Functions to perform operations or collect data on gaze position or behaviour.
To familiarize yourself with various use cases of the TRACKPixx during experiments, please see our Template Experiments demonstrating potential uses of your tracker.