From LabMaestro 1.11, we have improved functionalities related to expression generation. The LabMaestro software now includes autocompletion for expressions, along with a brand-new expression editor interface.
Expression Autocomplete
When entering “=” in a field compatible with expressions will now open an autocompletion menu including all functions available from LabMaestro. You can navigate this menu with the up and down arrows on your keyboard or via your mouse. This is similar to how spreadsheet software operate.
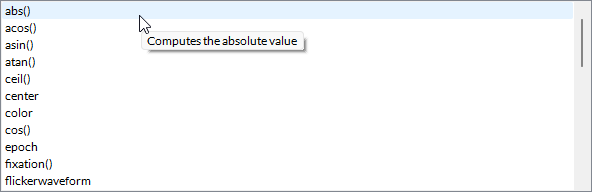
Hovering your mouse over a function will reveal tooltips detailing what each function does.
As you write more elements of your expression, the menu will automatically refine and include only valid functions. For instance, adding the “a” letter after “=” will only suggest valid functions with names starting with the letter “a”. If you enter the name of an object (e.g., the tracker global variable) followed by a “.”, only existing properties of this object will be suggested in the autocompletion menu.

Expression Editor
The expression editor can be used for more complex expressions or as an interface to navigate more easily. The expression editor is accessed by pressing the “fx” icon located at the rightmost end of an expression field (as you can see in the screenshot above).
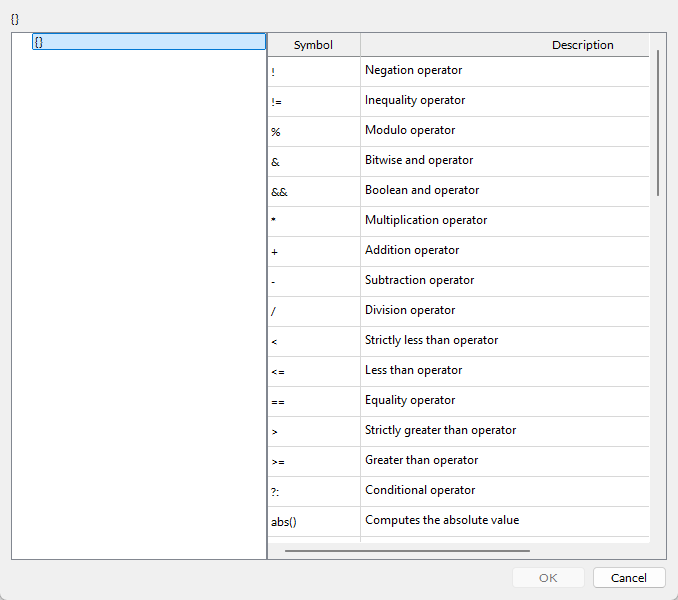
The expression editor is divided into two sections: on the left is the expression itself, broken down into nodes that must be filled, while on the right is the expression list, which includes functions/operators paired with tooltips that explain their use.
Entering Expressions using the Expression Editor
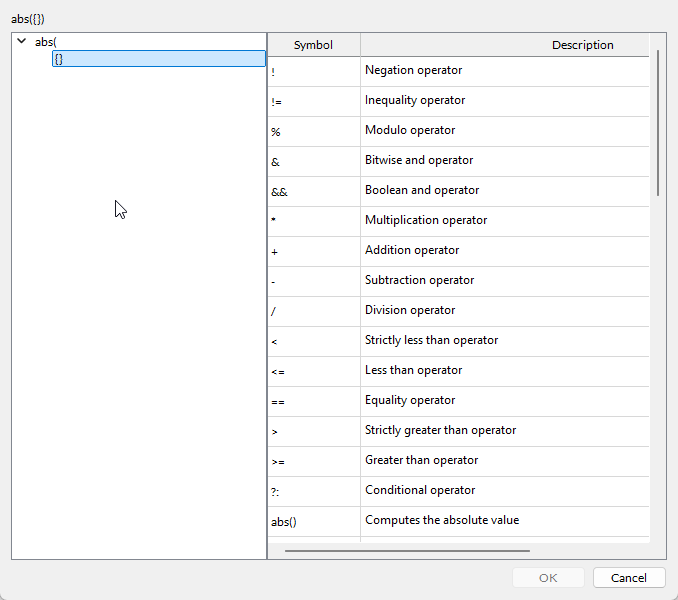
The expression editor separates expressions into nodes, represented as “{}” while empty. By either clicking on a function shown in the expression list or manually typing a function, the node will be filled, adding “child nodes” for each argument, if applicable. Autocomplete is disabled in the expression editor.
As an example, let us enter the “abs” function in the first node:
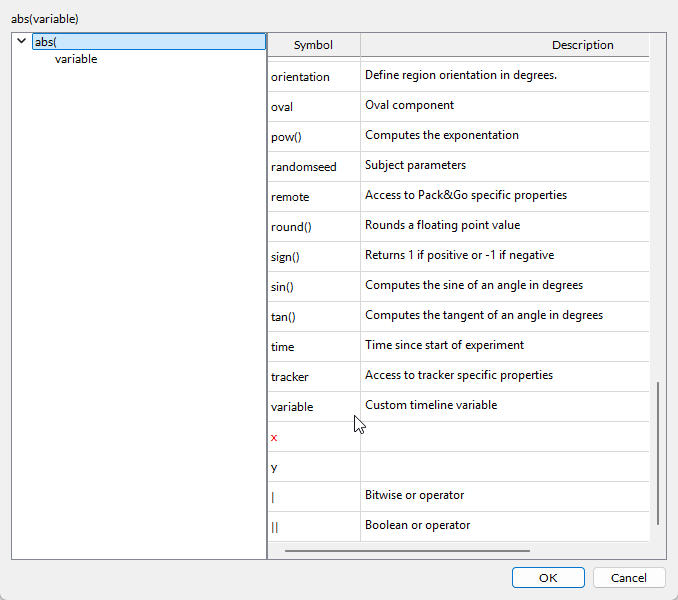
We can then enter a value inside the empty child node, which can be a numeric value, an expression that returns a numeric value, or a timeline variable. Here, we could apply the “abs” function to a custom timeline variable (named “variable”). We can simply enter the variable name, which will appear in the right section of the Expression Editor window.
Once your expression is valid (all nodes have been filled with appropriate values), the “OK” button will become available at the bottom of the expression editor window. Pressing this will fill the field from which you opened this window with the expression you defined (in this case, “=abs(variable)”).